Adding single or multiple contacts to a specific marketing campaign or workflow has never been faster and simpler. Follow these steps to streamline your workflow:
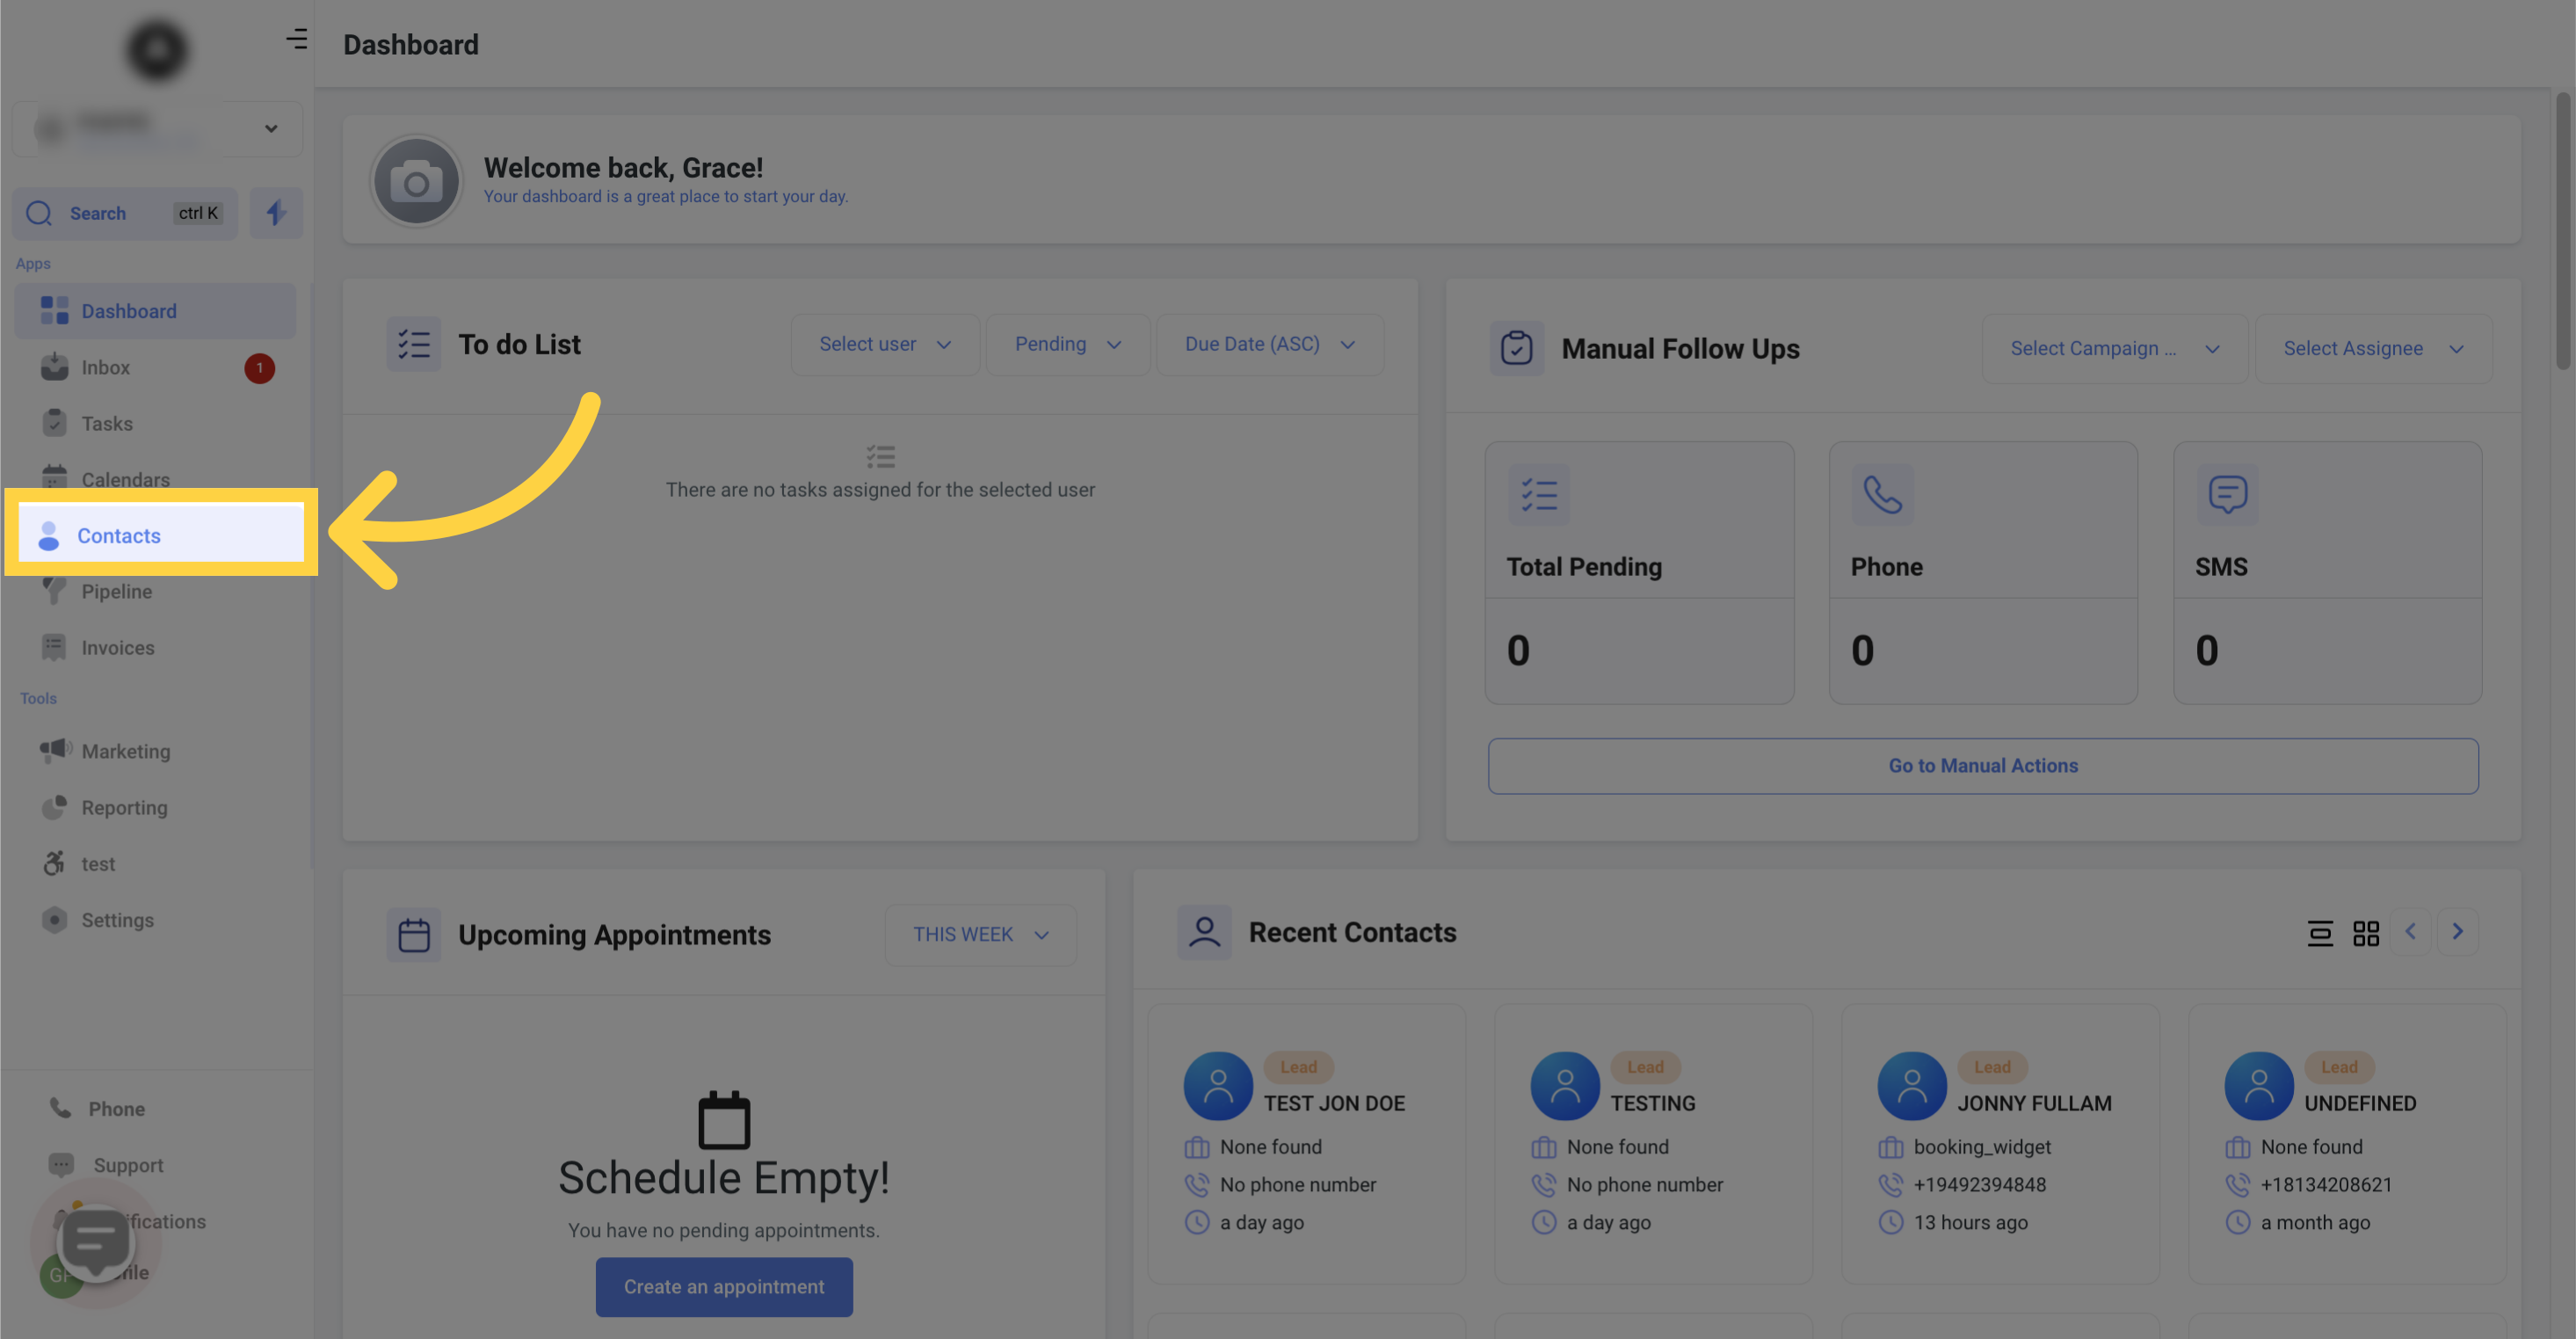
1. Click "Contacts"
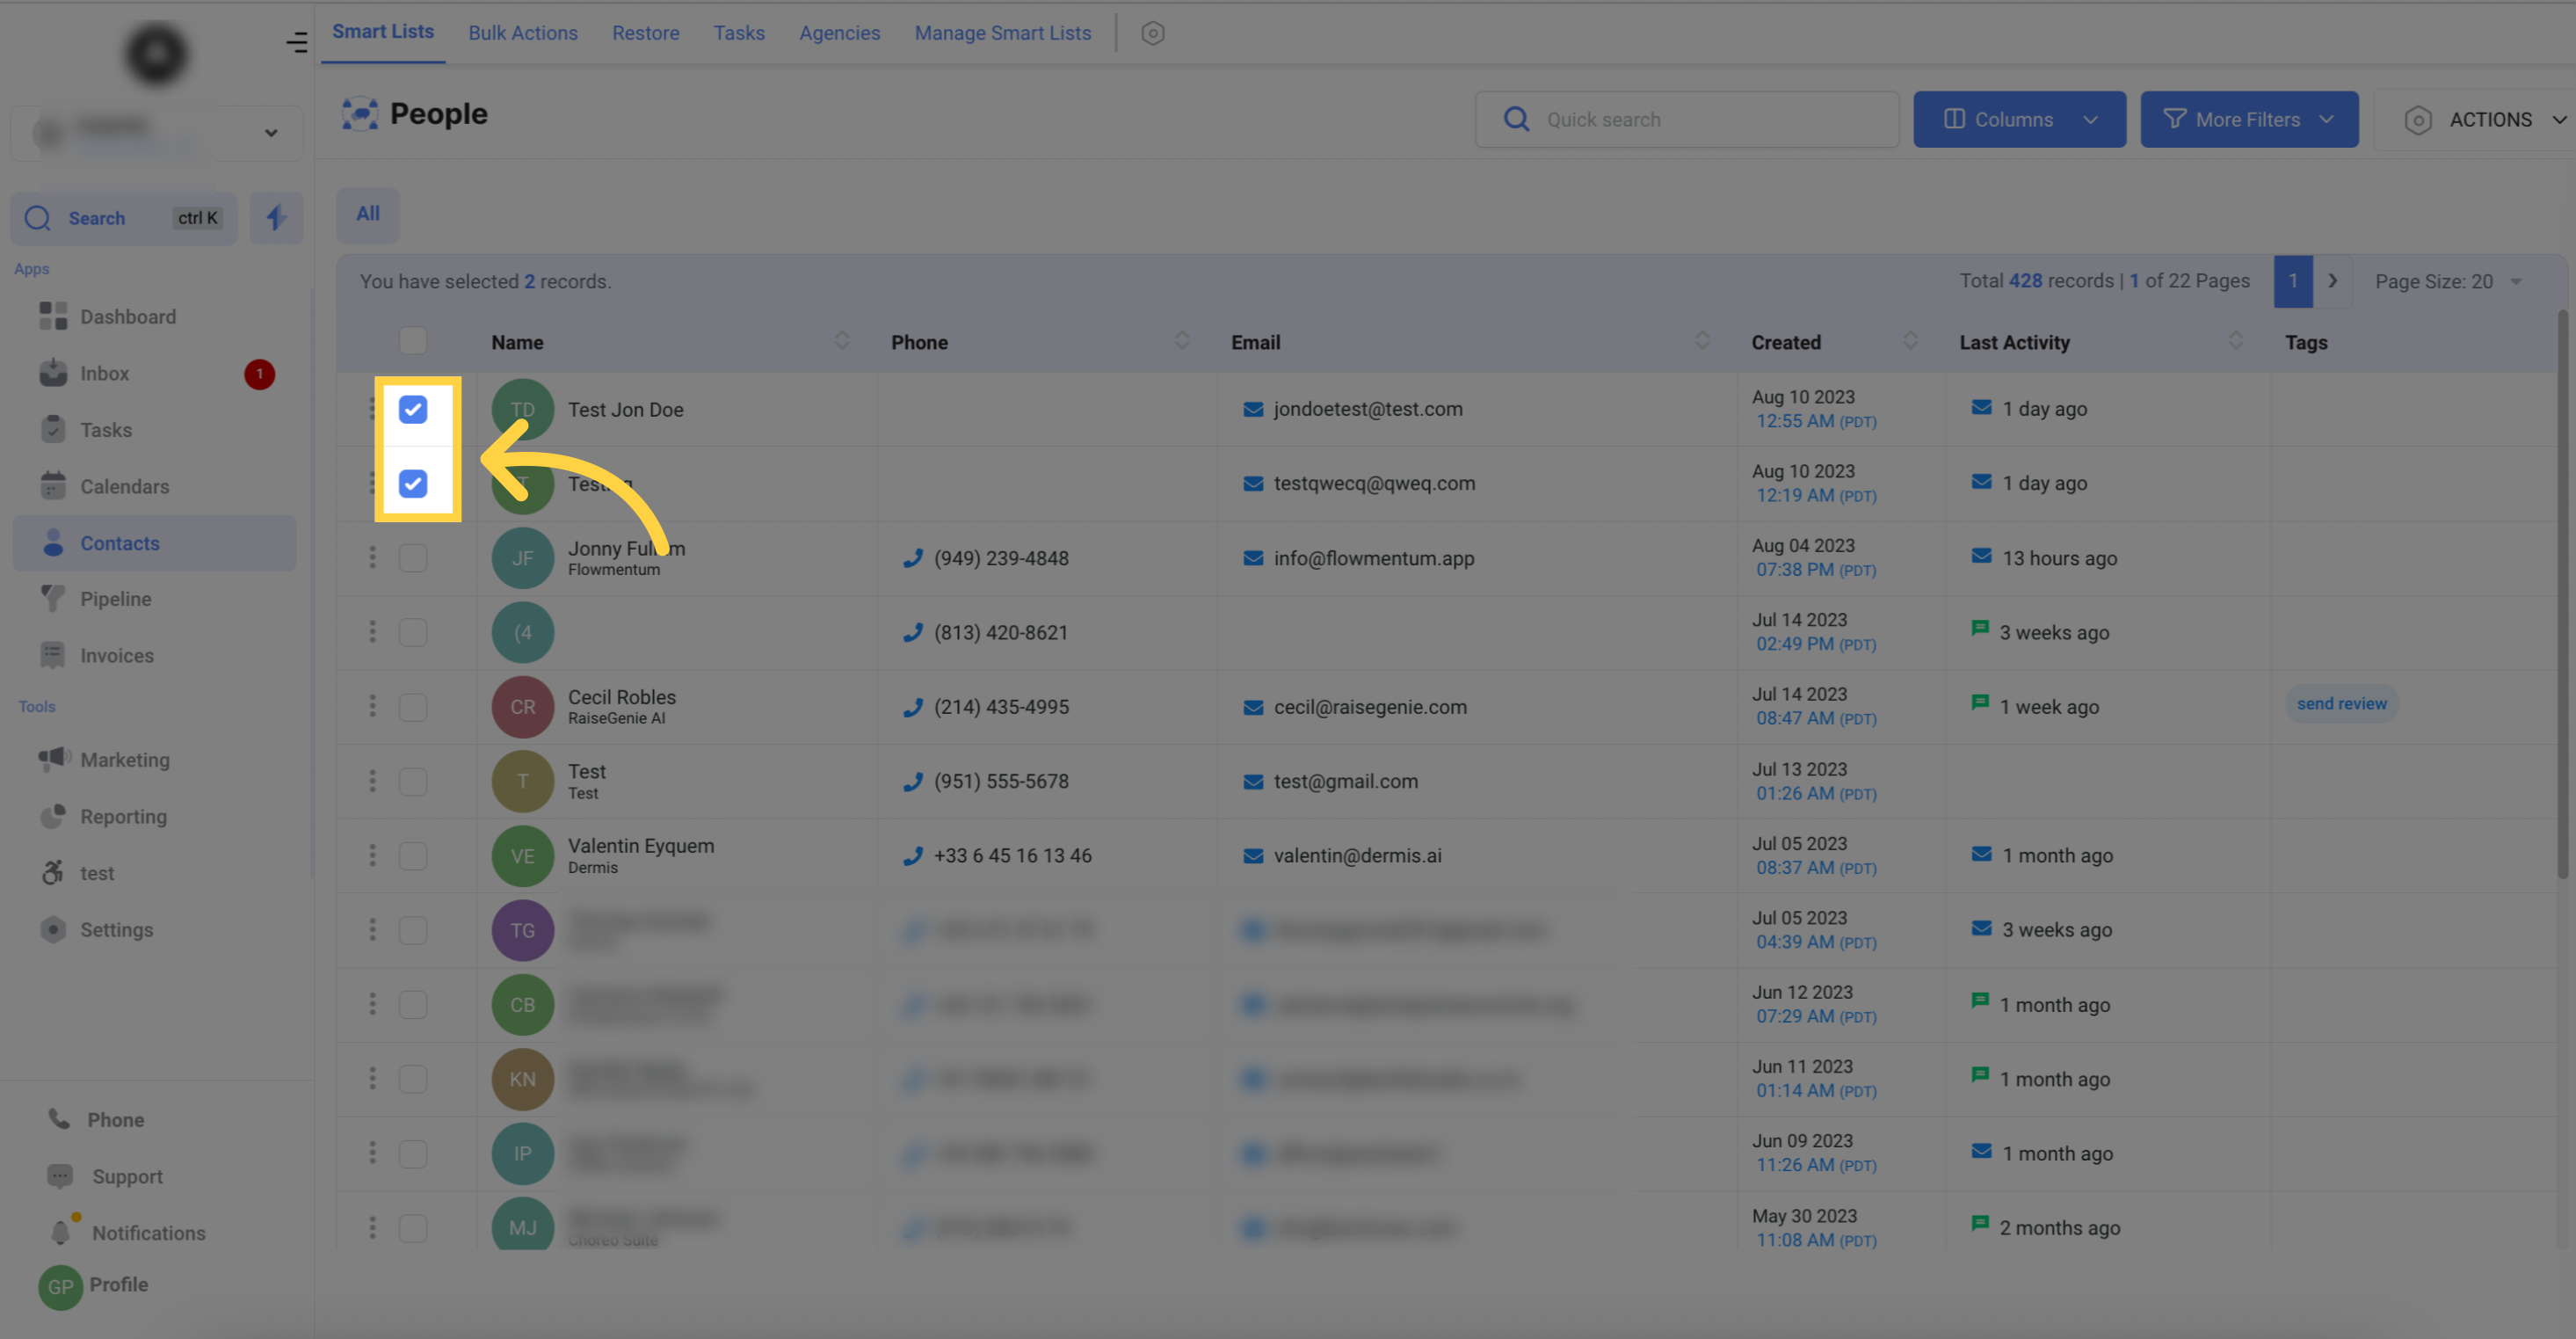
2. Click here to select "Contact Person" you want to add automation
Choose the contacts you want to add to your campaign or workflow
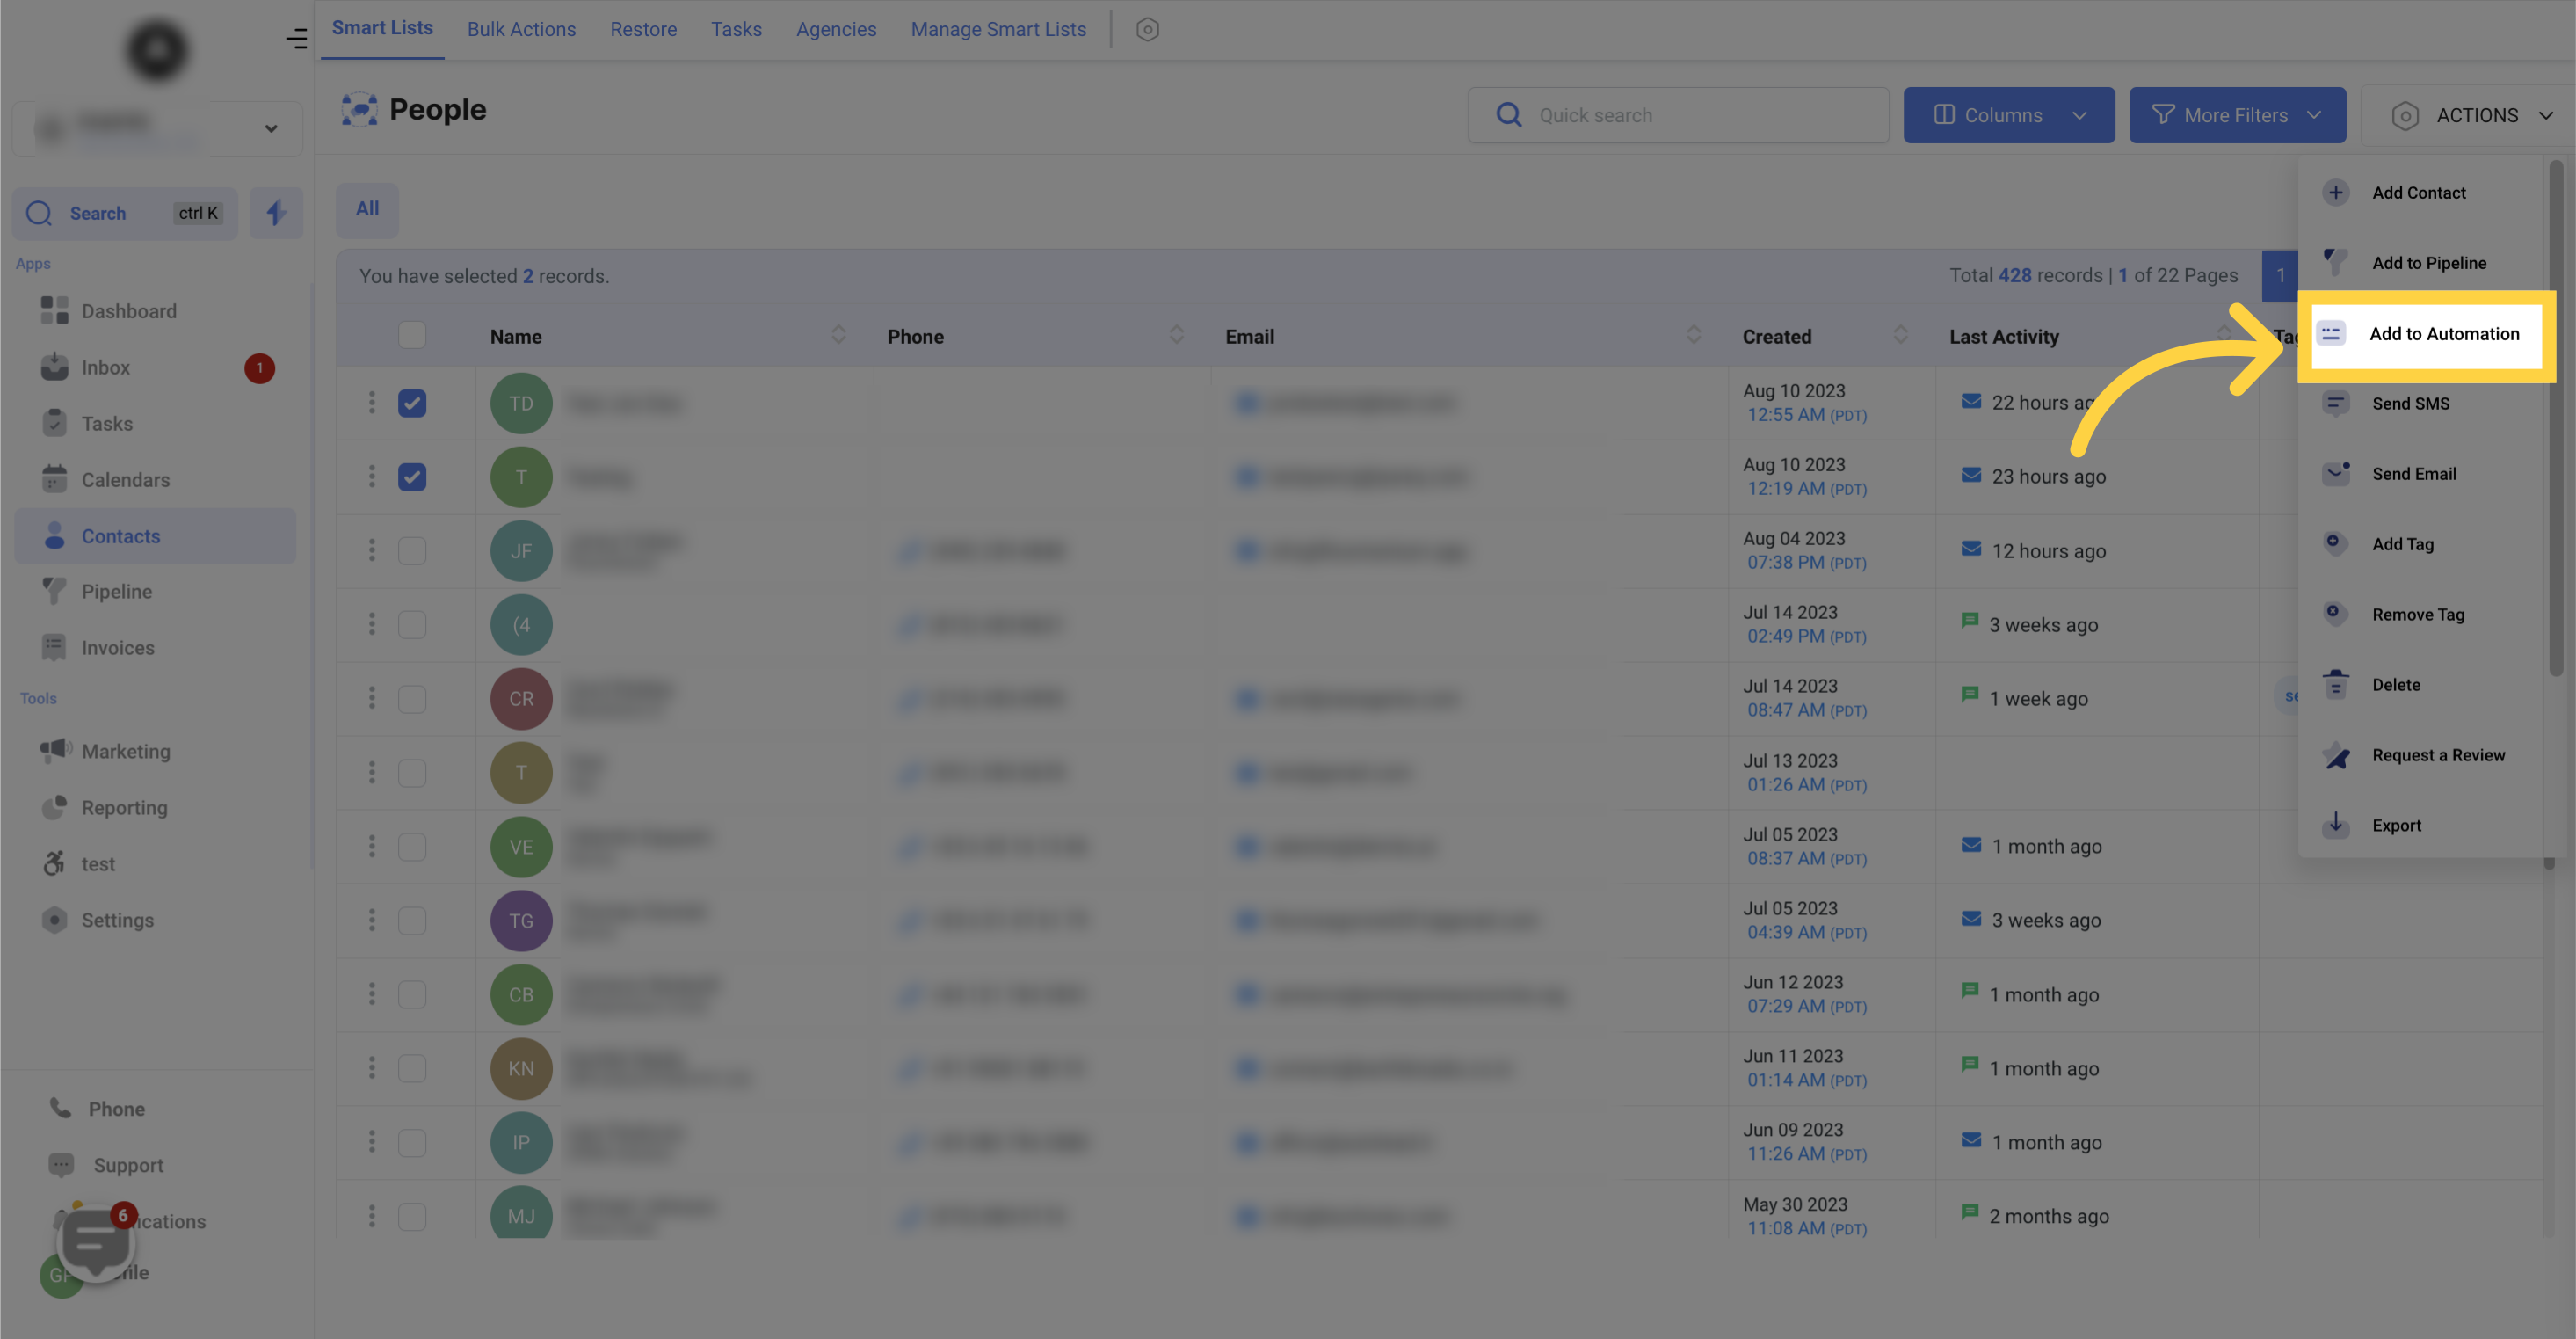
3. Click "Actions"

4. Select "Add to Automation"
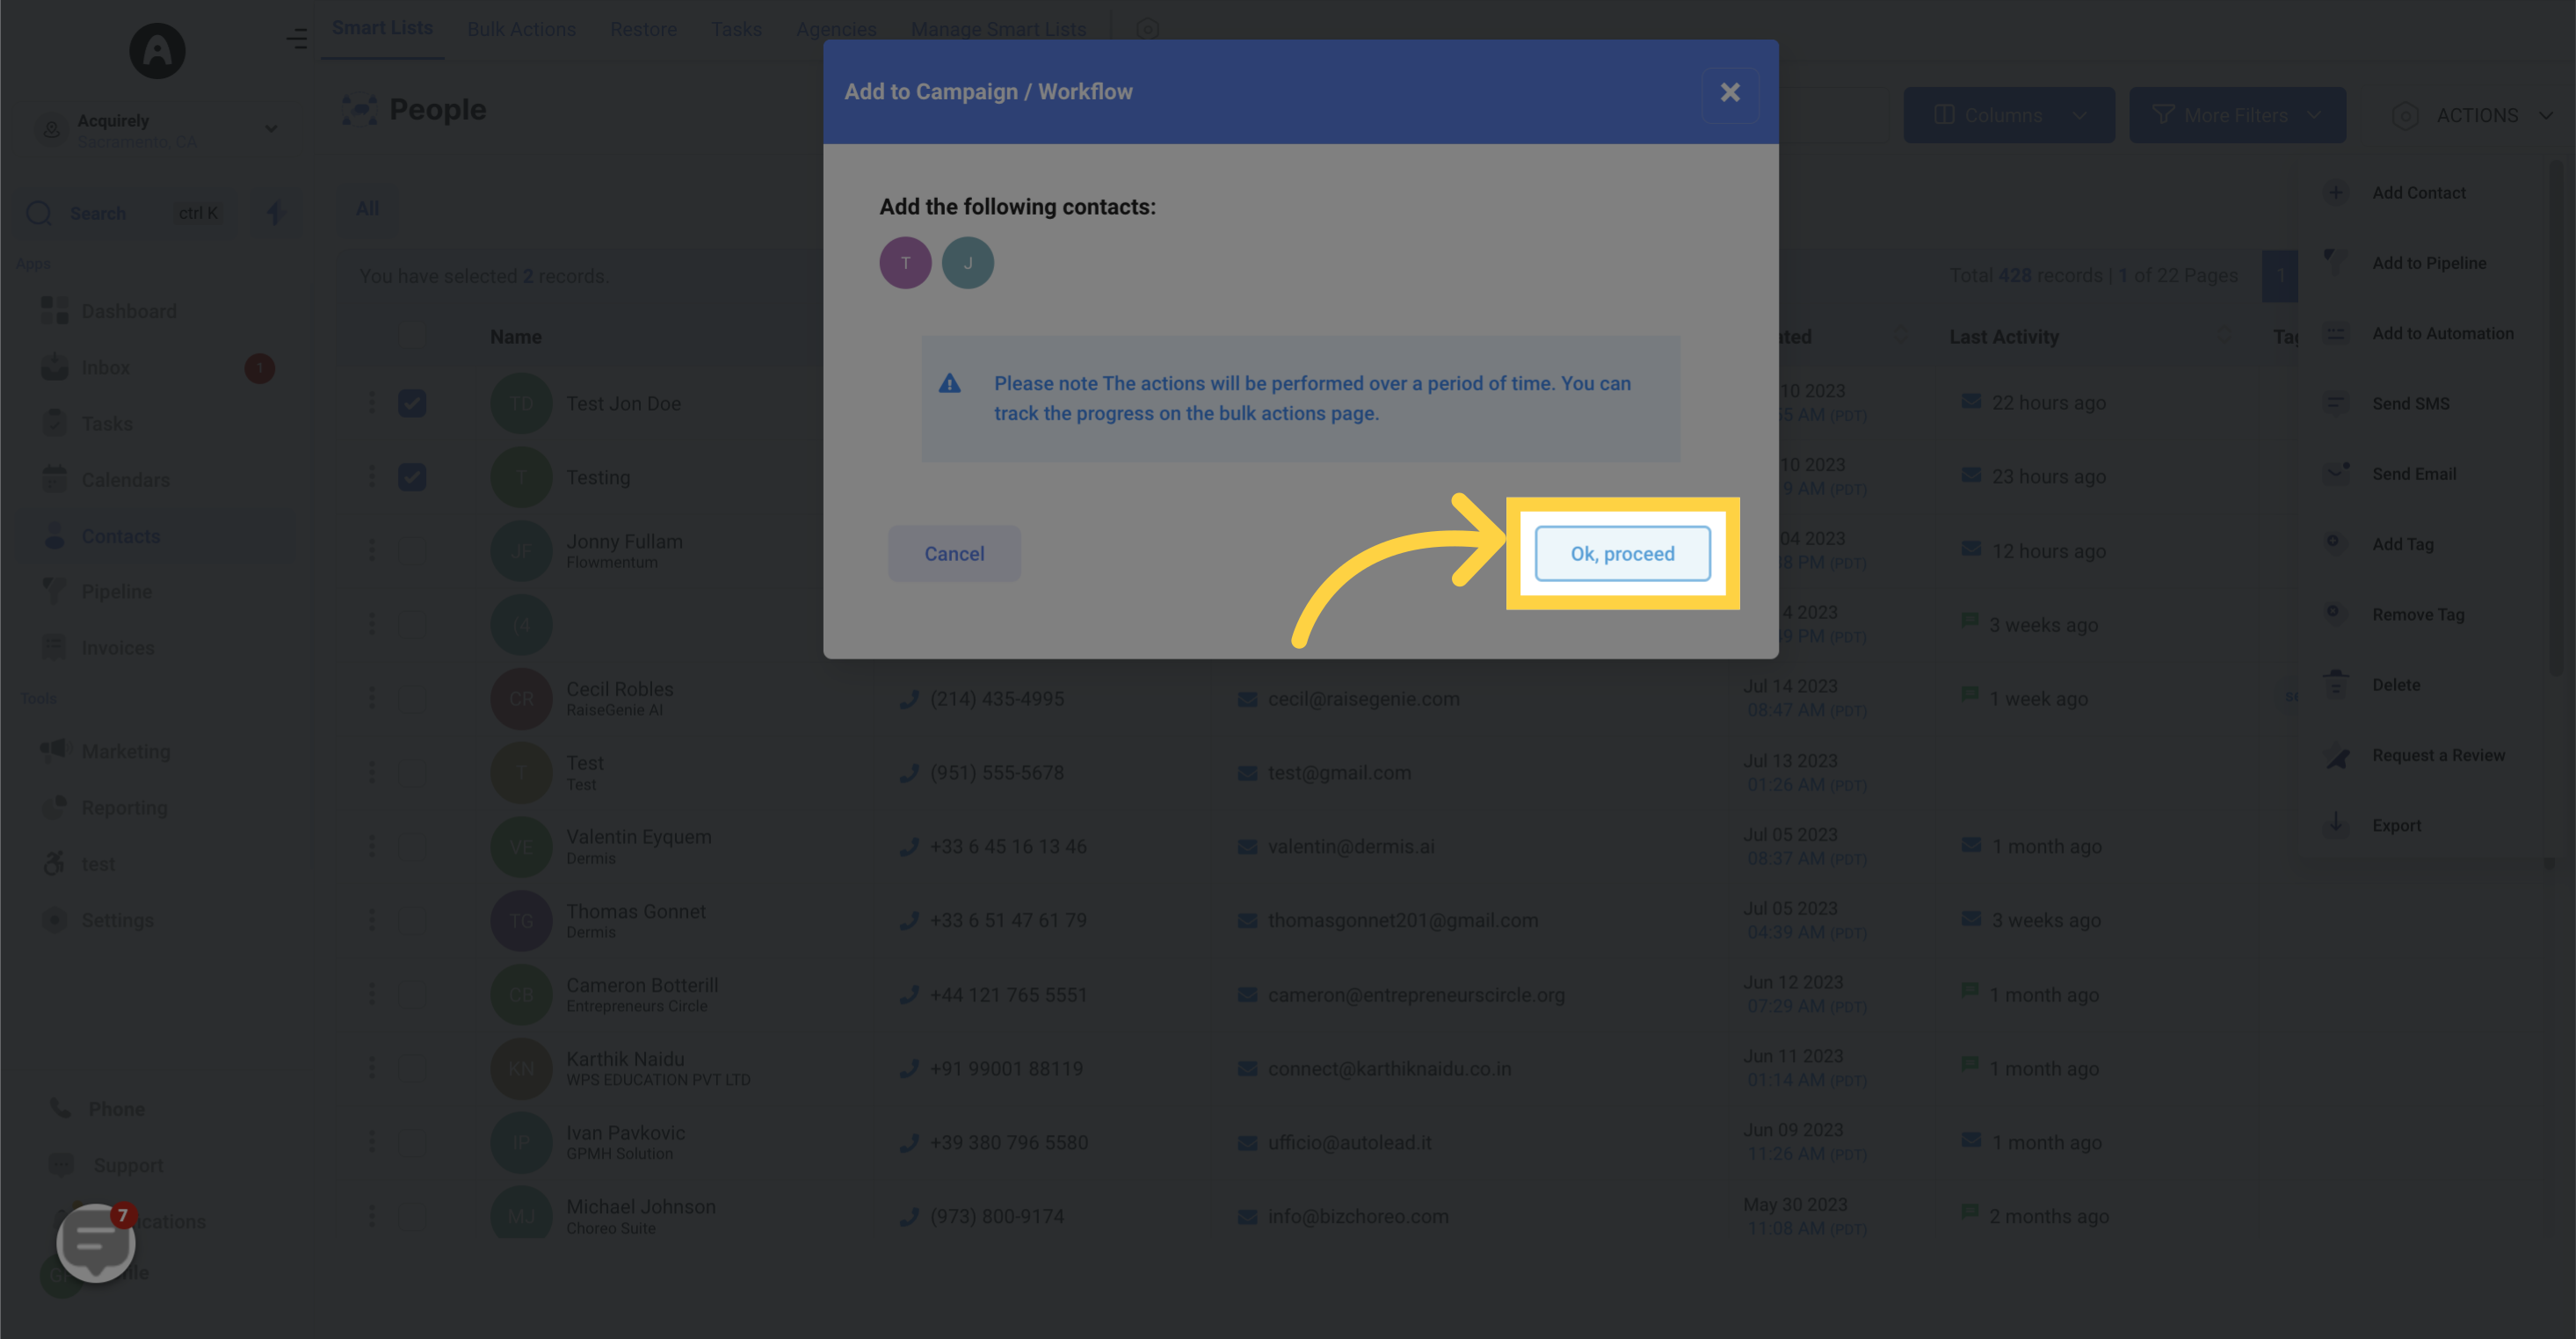
5. Click "Ok, proceed"
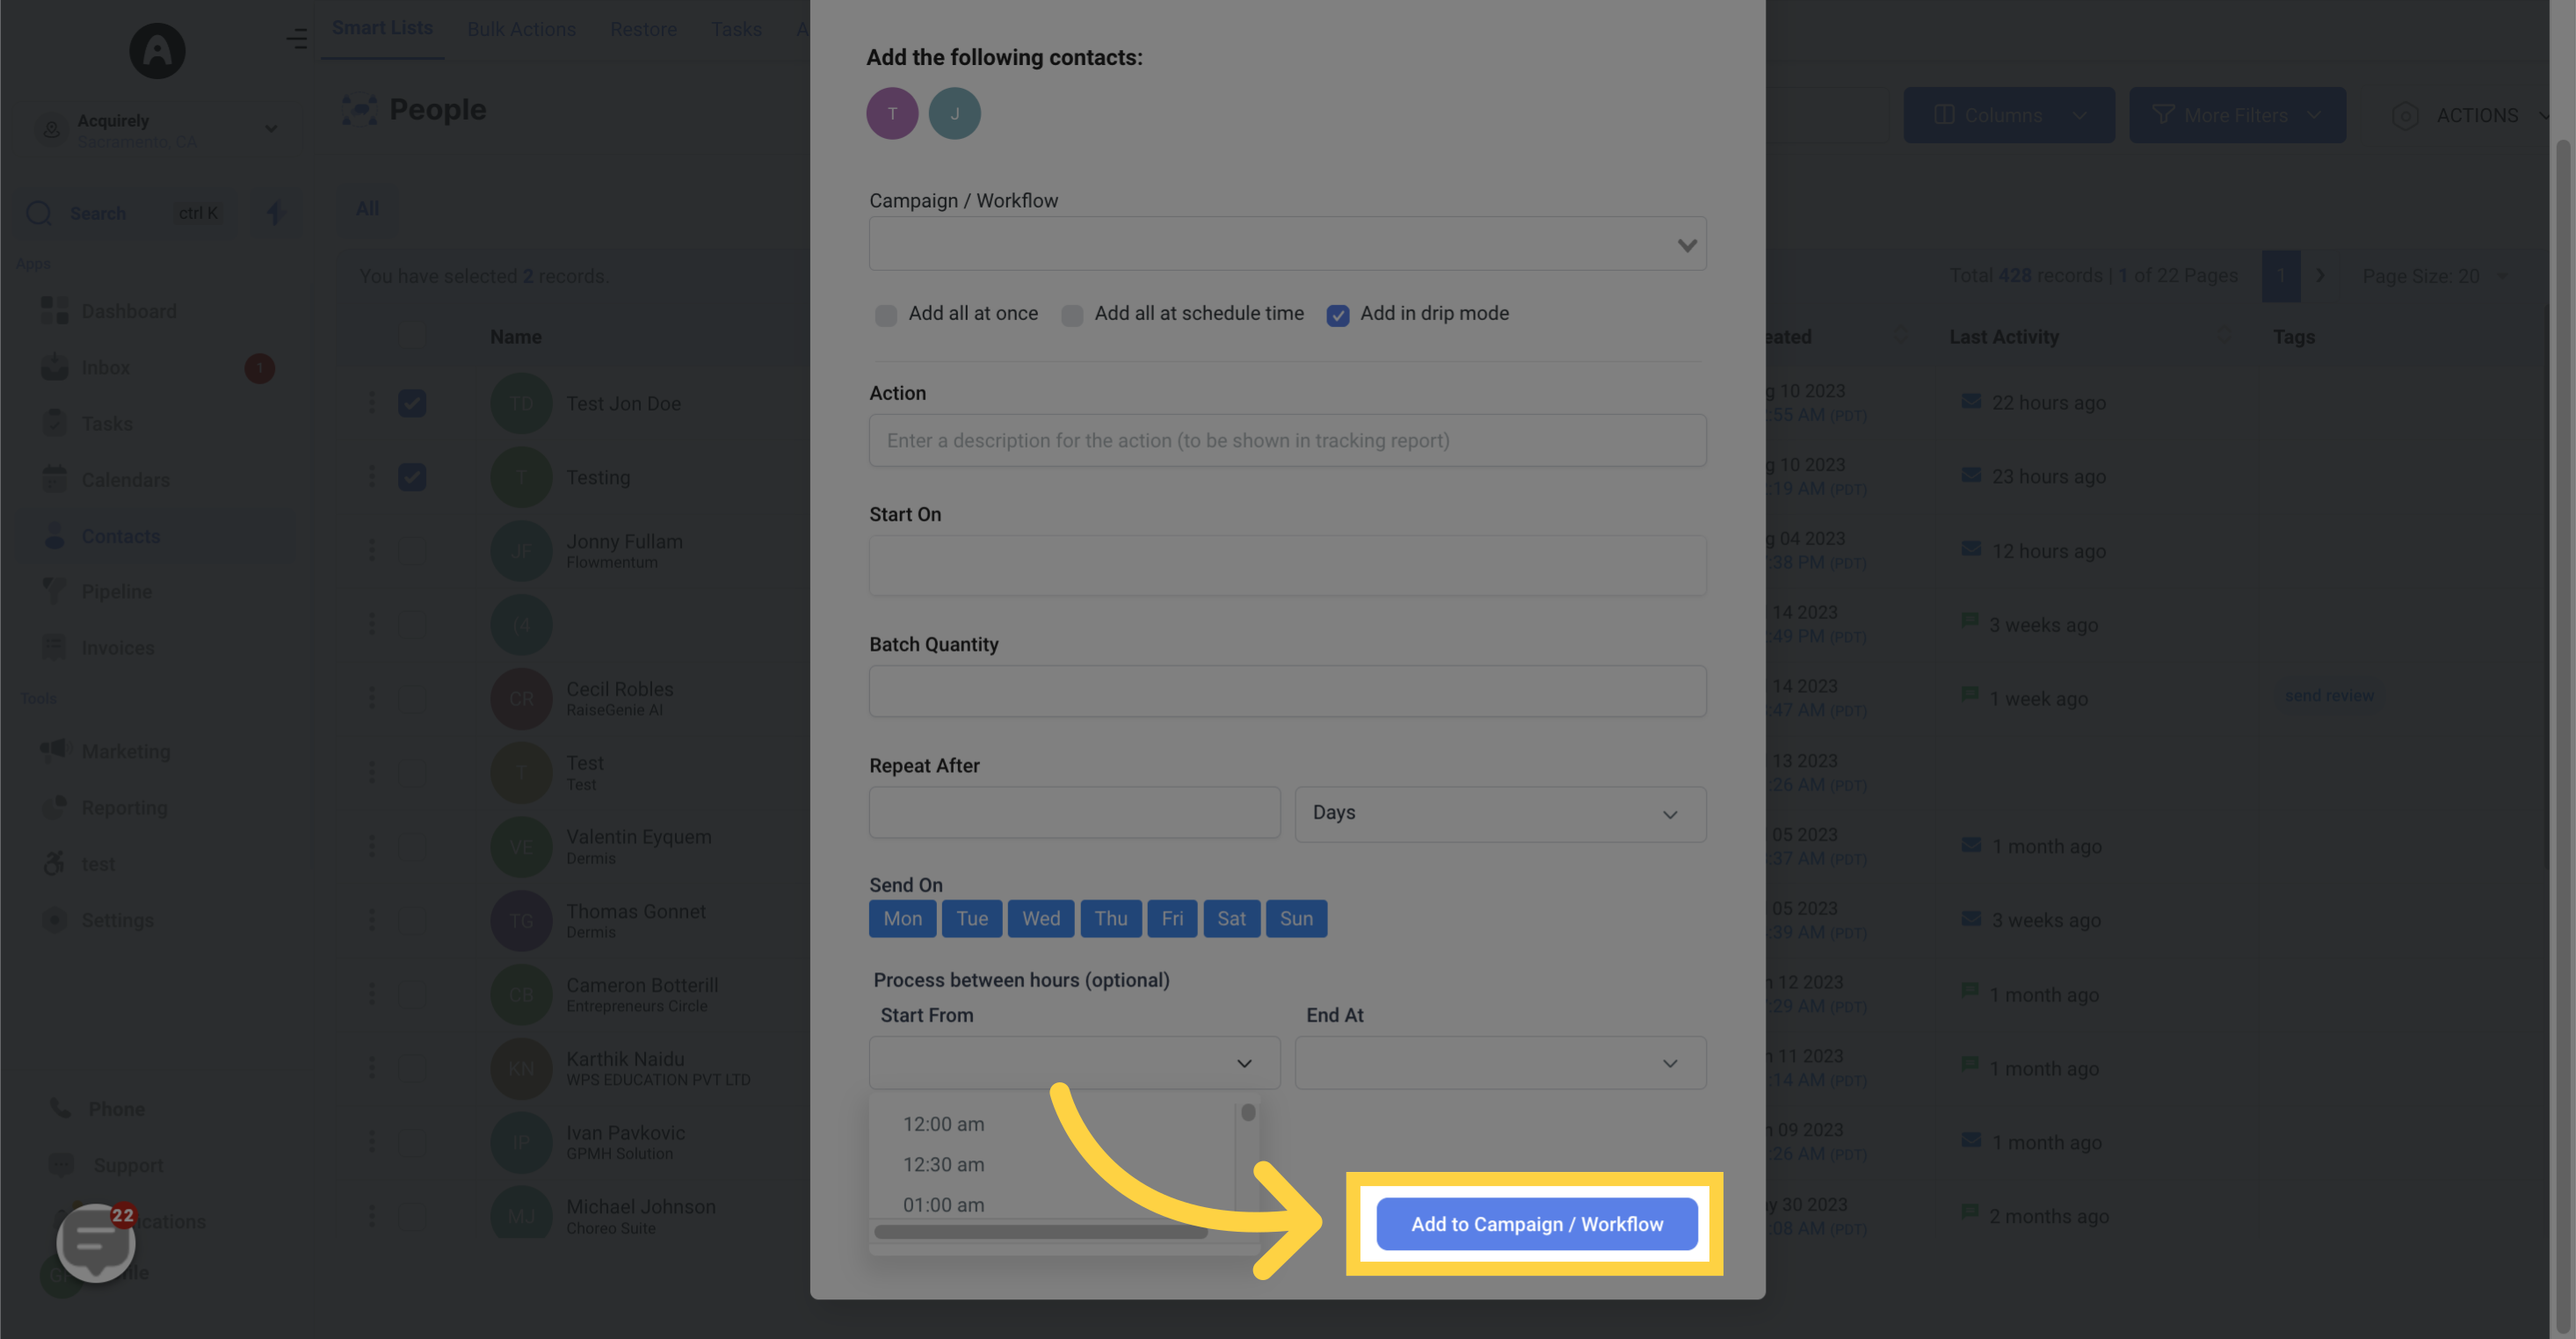
6. Select "Campaign/Workflow"

7. Click "Add all at once"

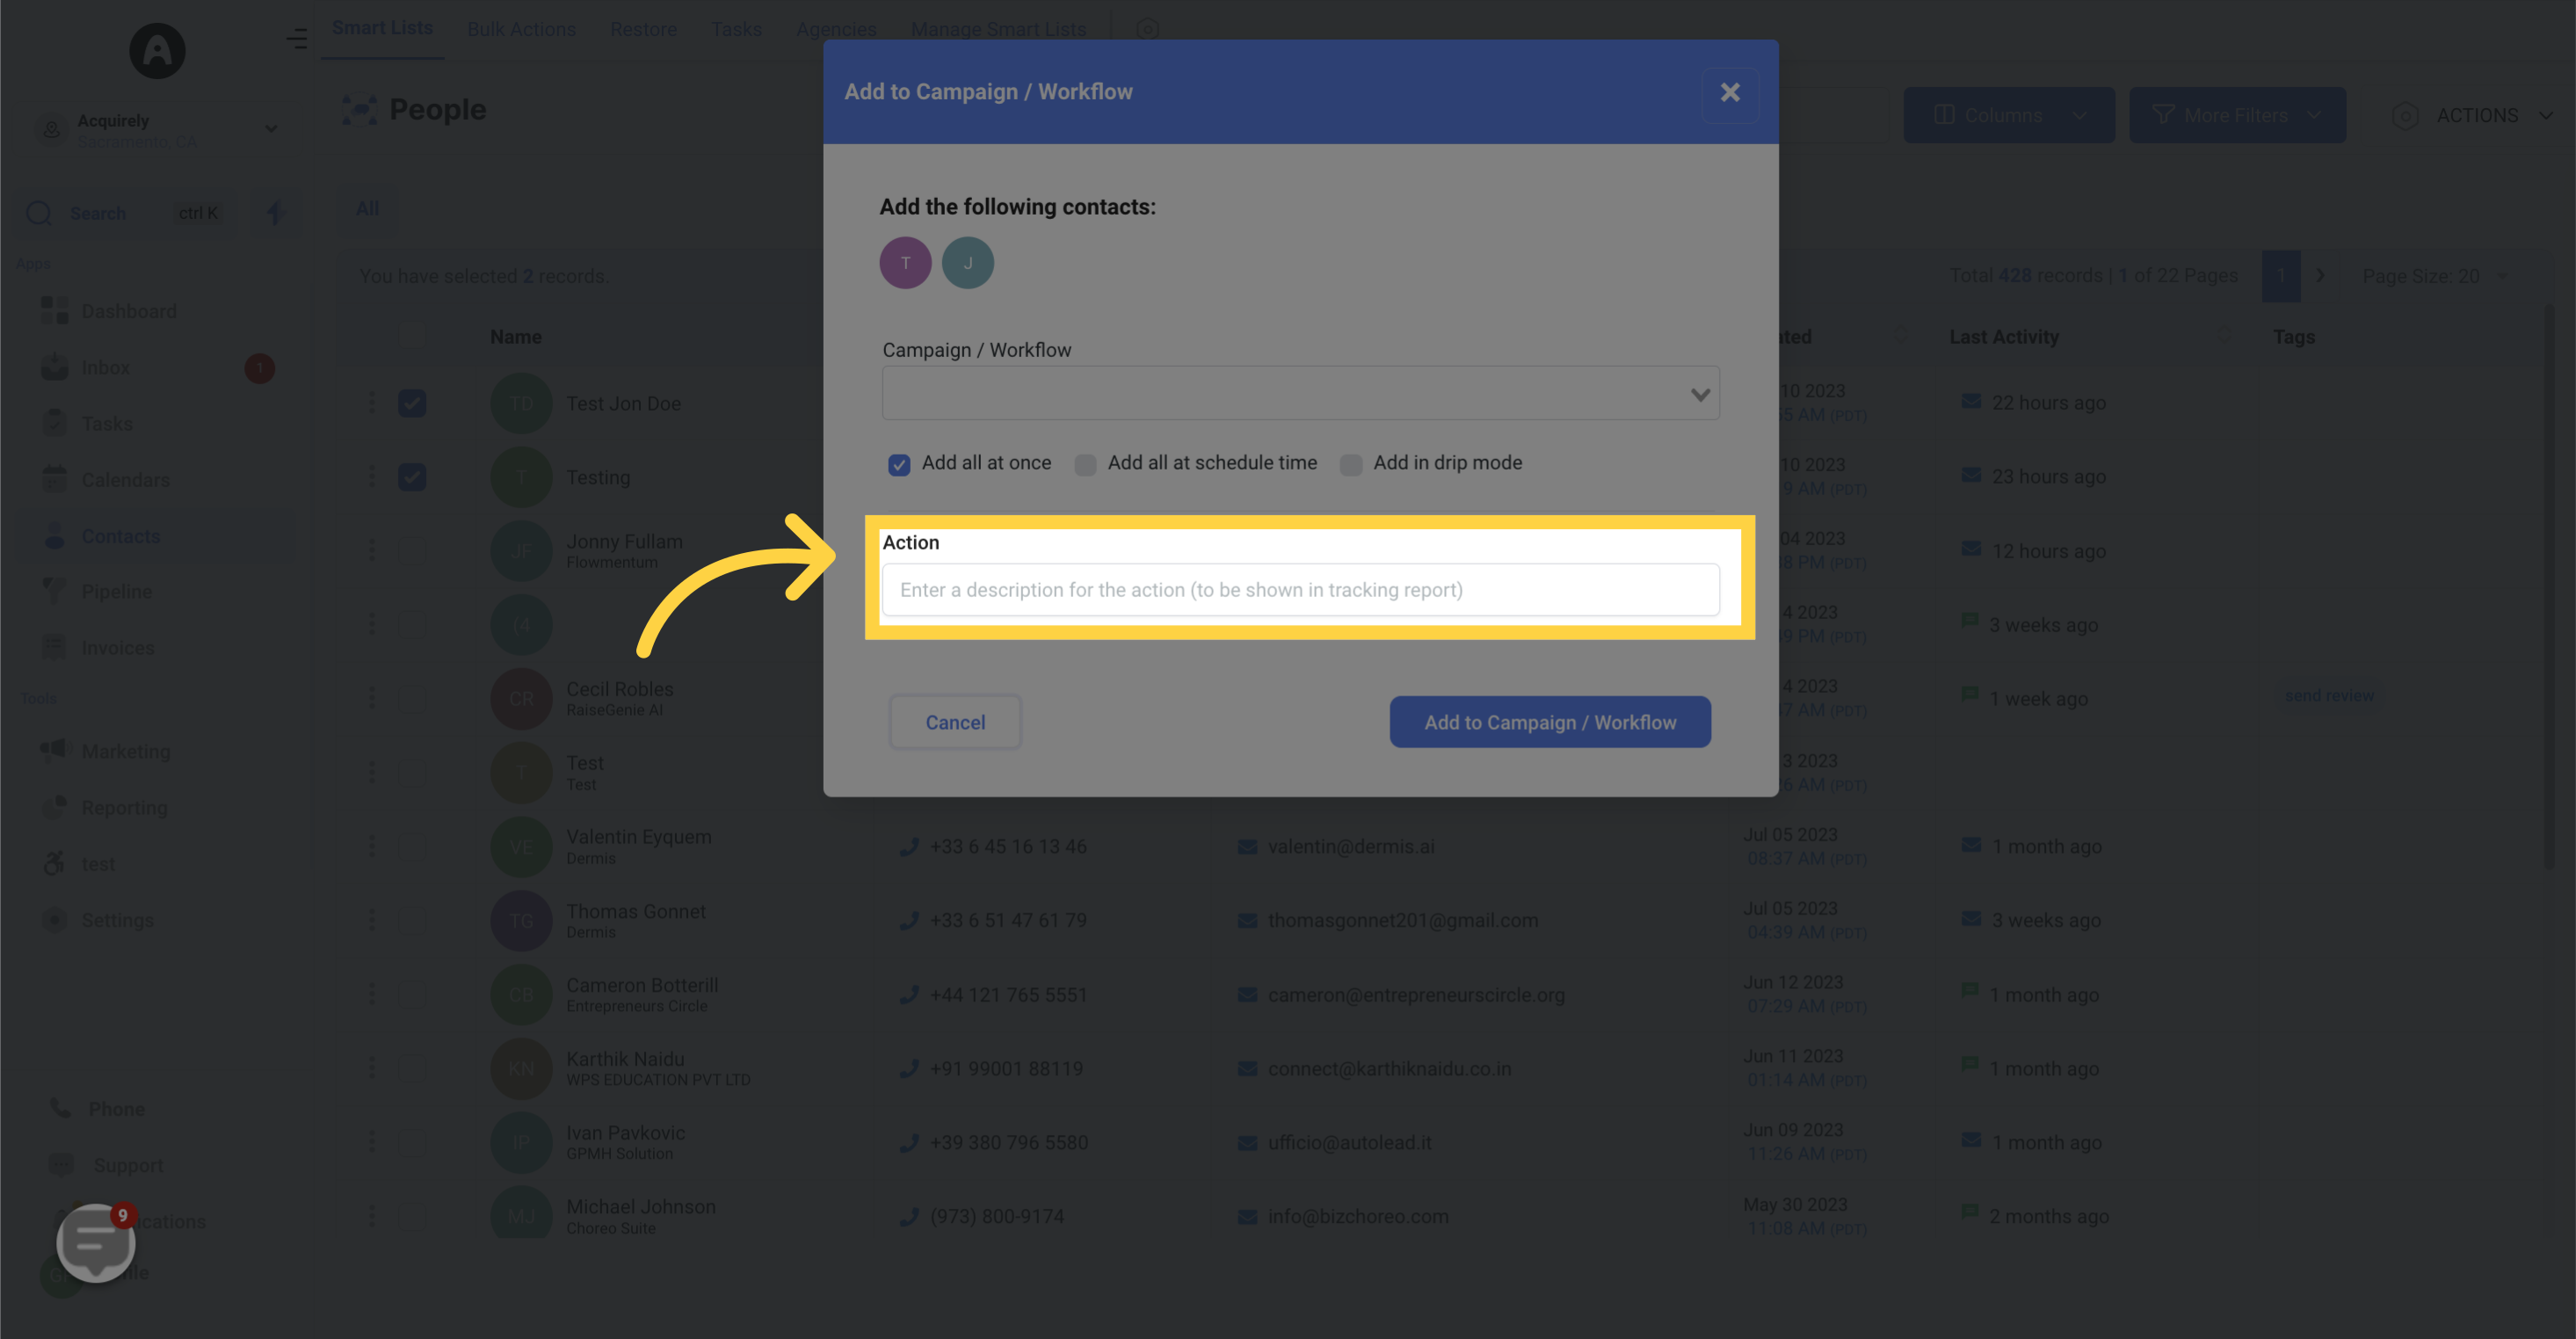
Input "Action"
When naming the action, ensure that the name you choose is recognizable in tracking reports. This description will be displayed in the tracking report for easy reference.
8. Click "Add all at schedule time"
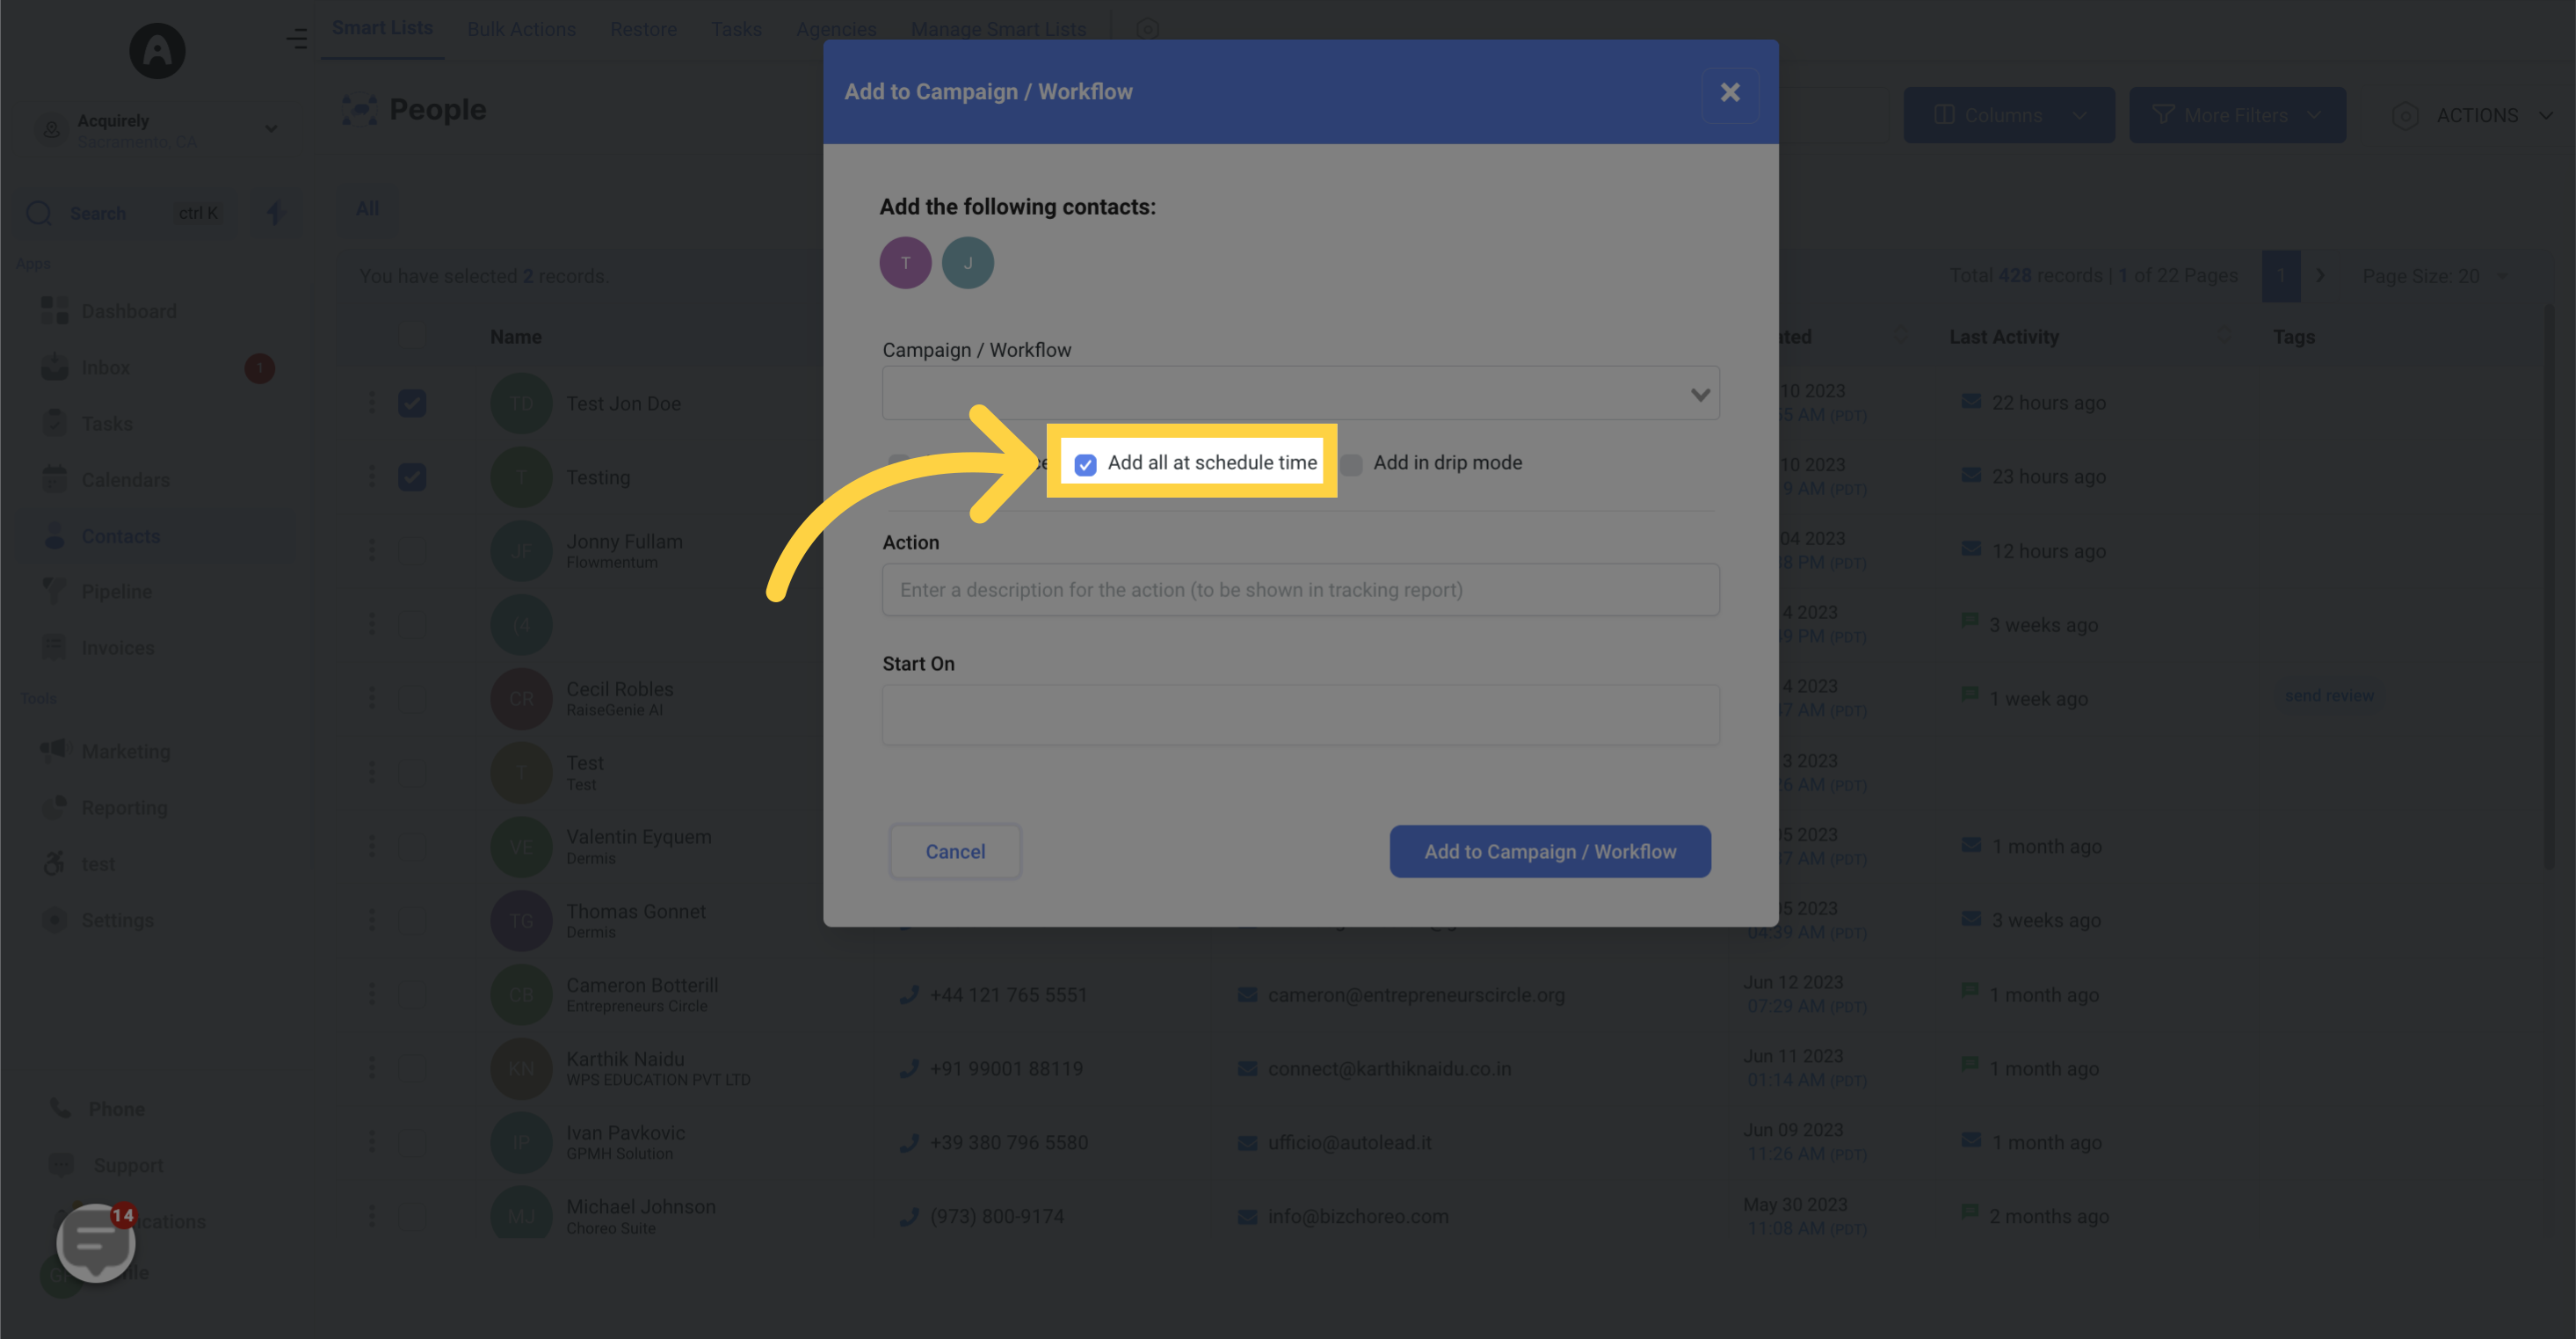
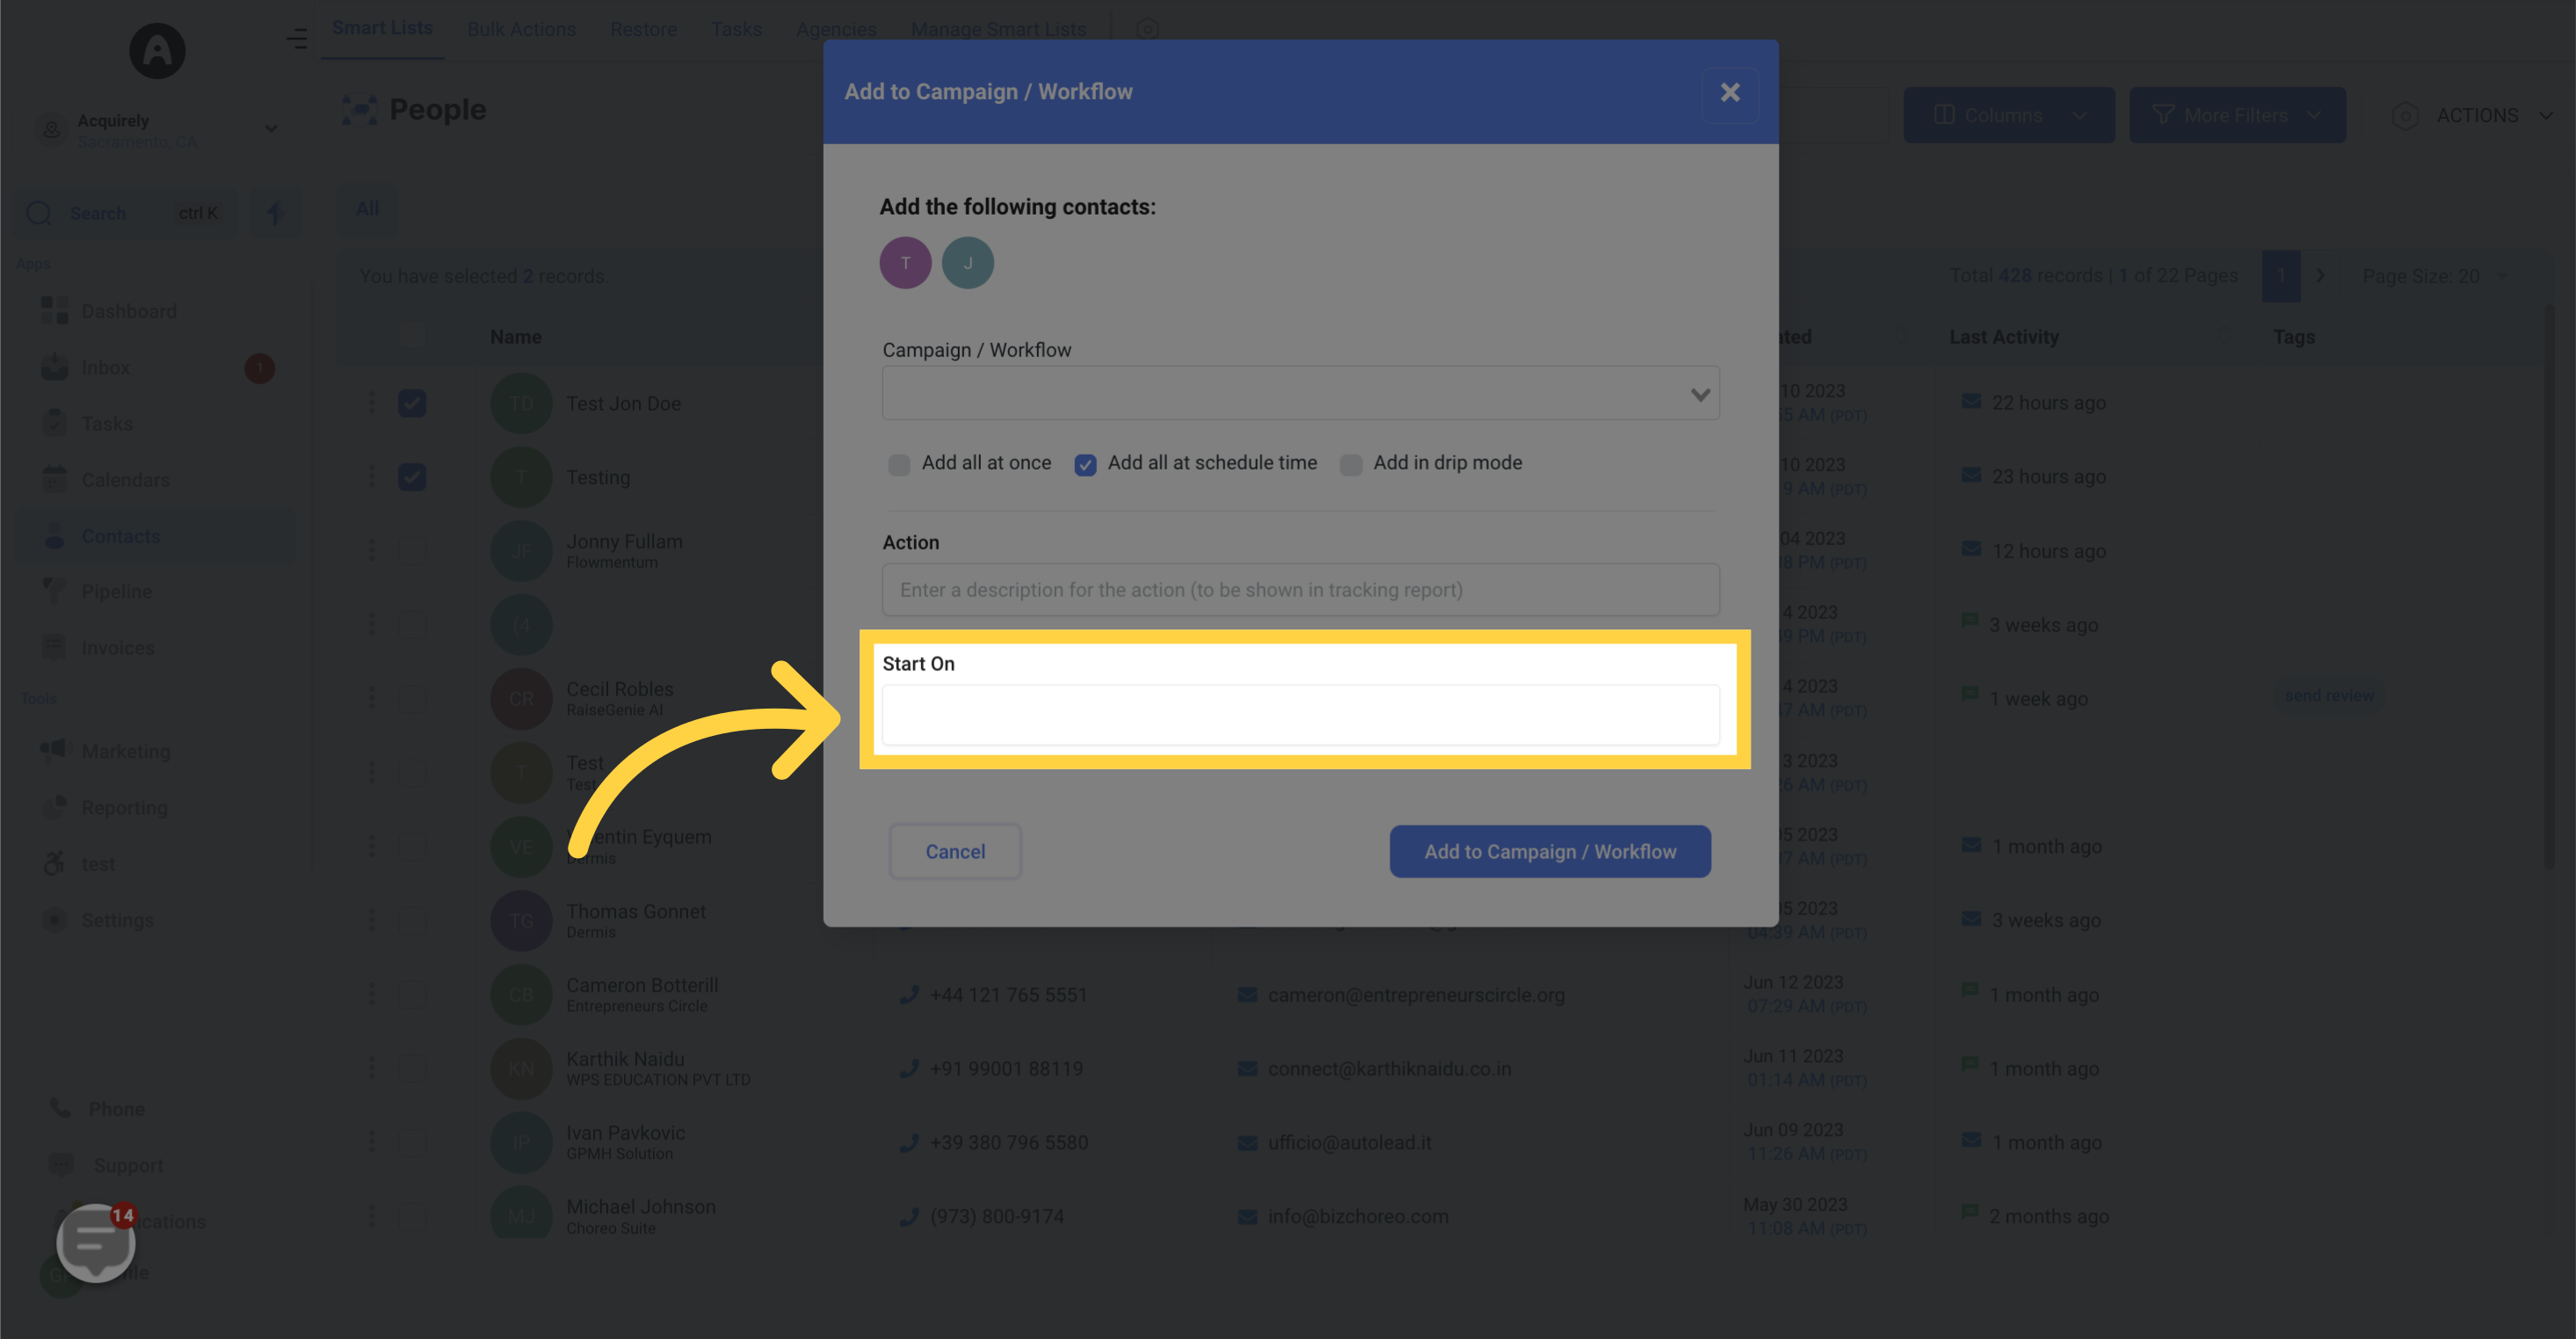
Select the "date and time"
Select the date and time when you want to schedule your contacts to be added to the campaign.
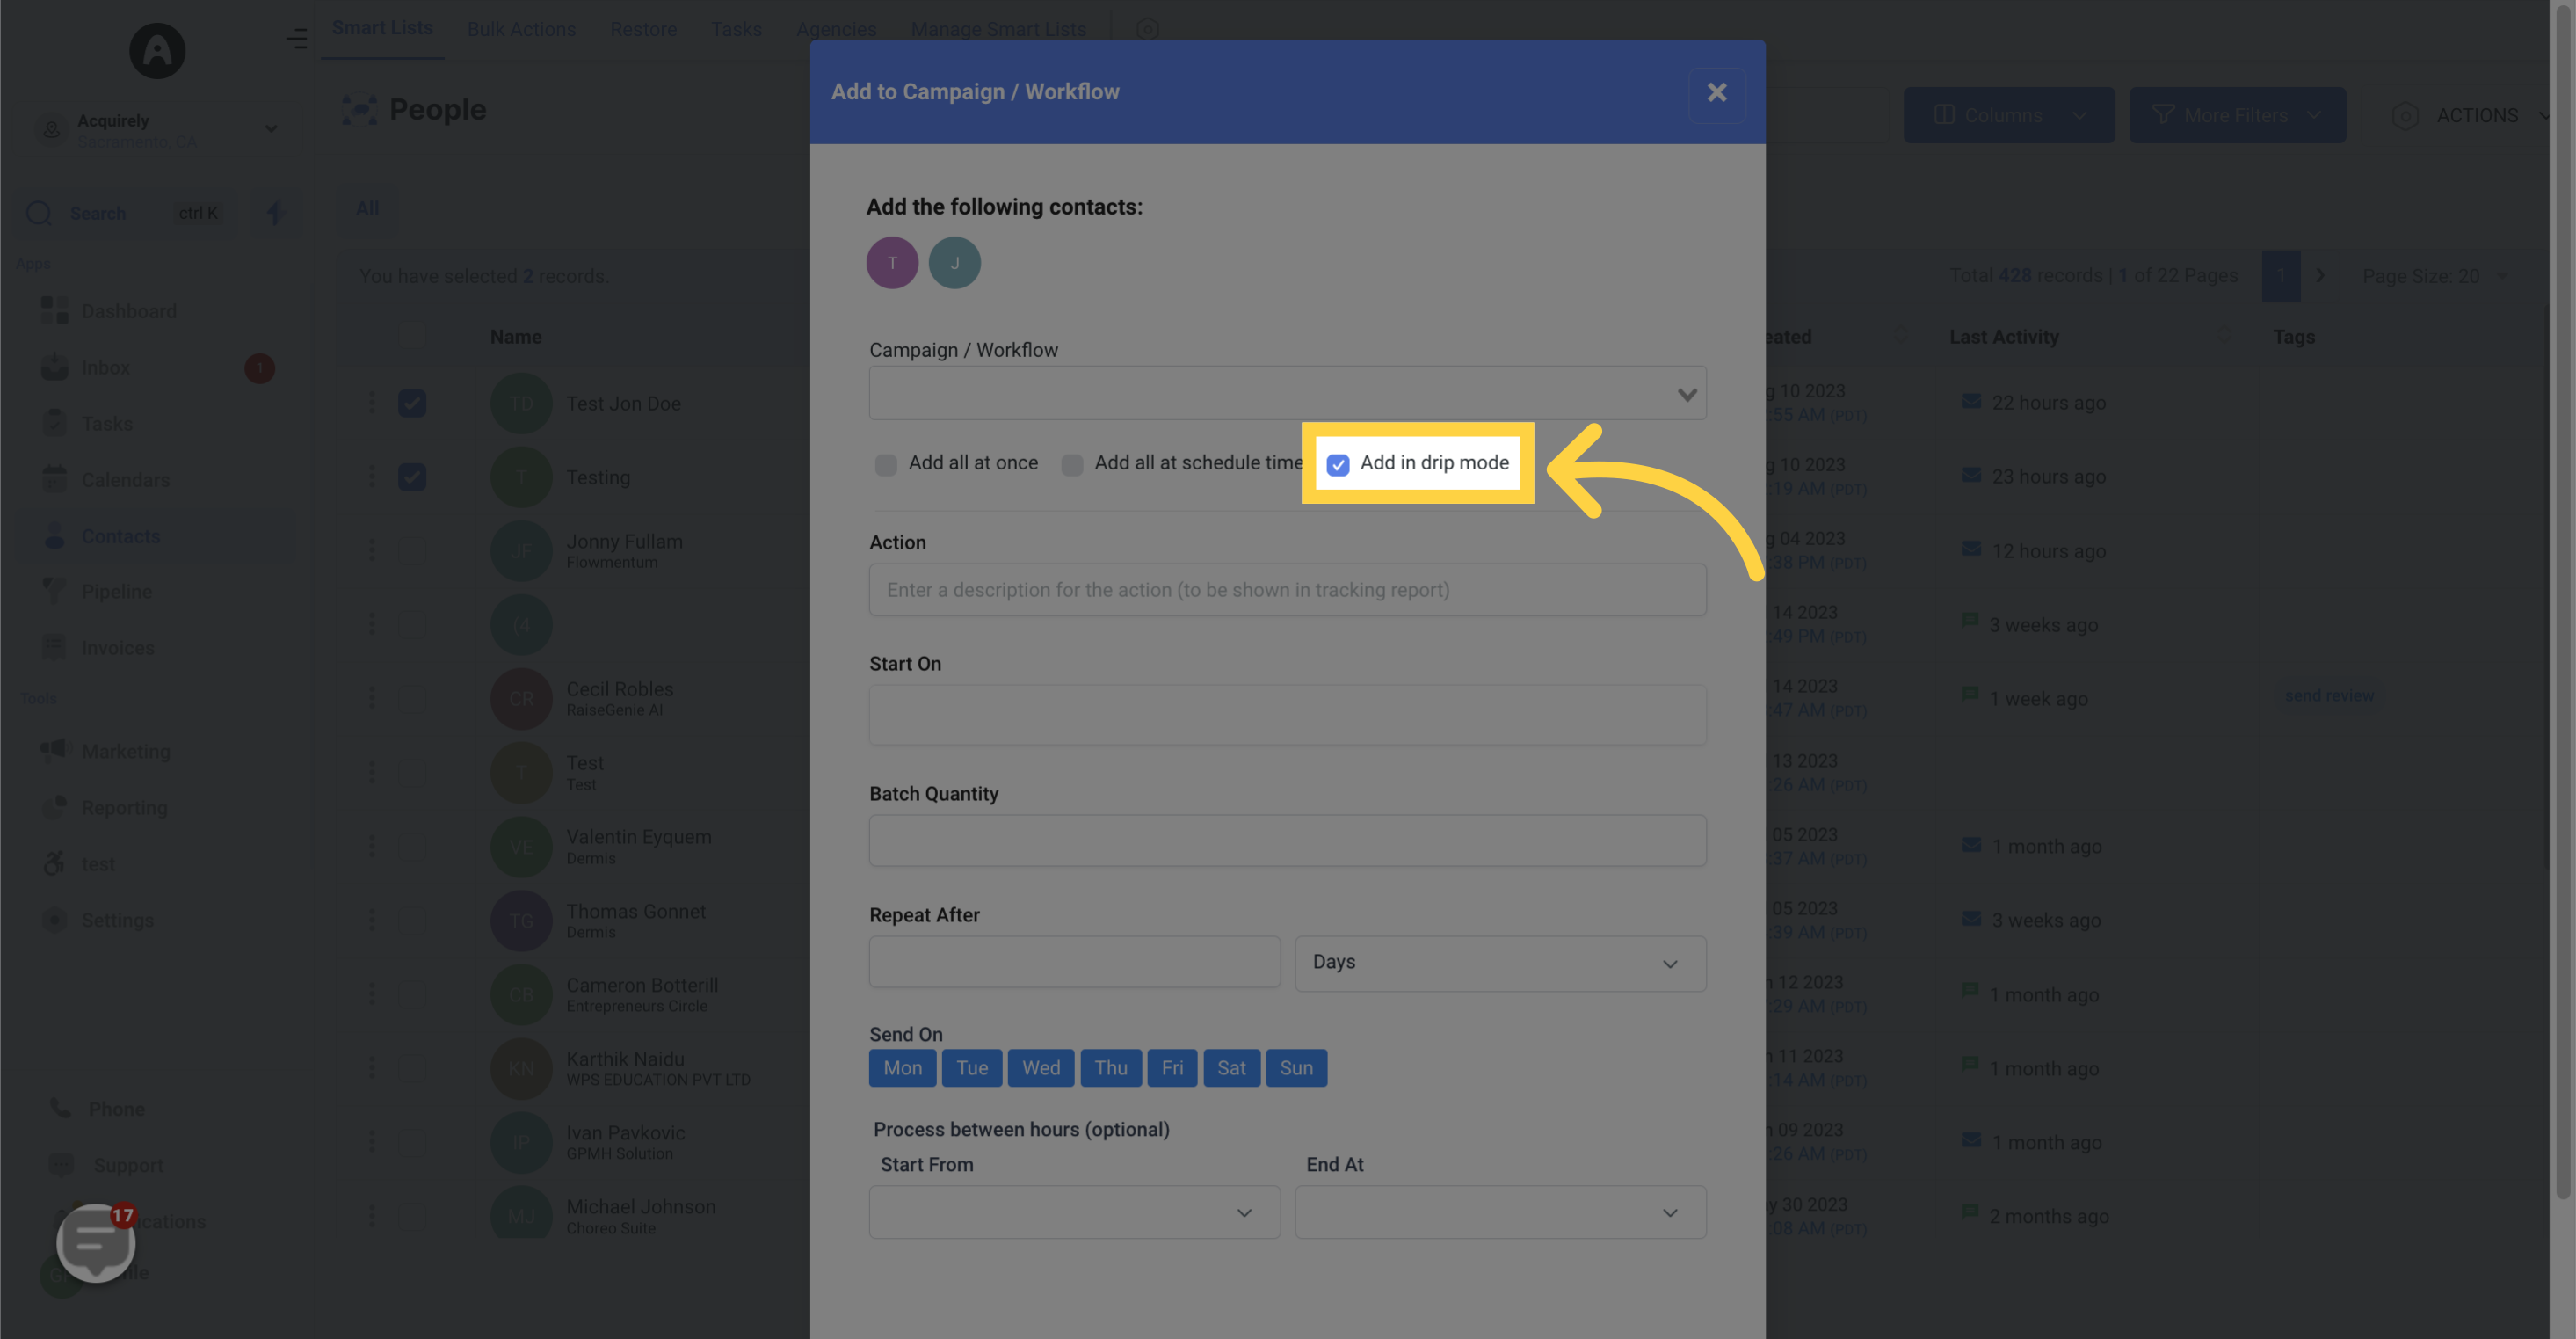
9. Click "Add in drip mode"
If needed, you can choose to add contacts in batches using the drip mode option.
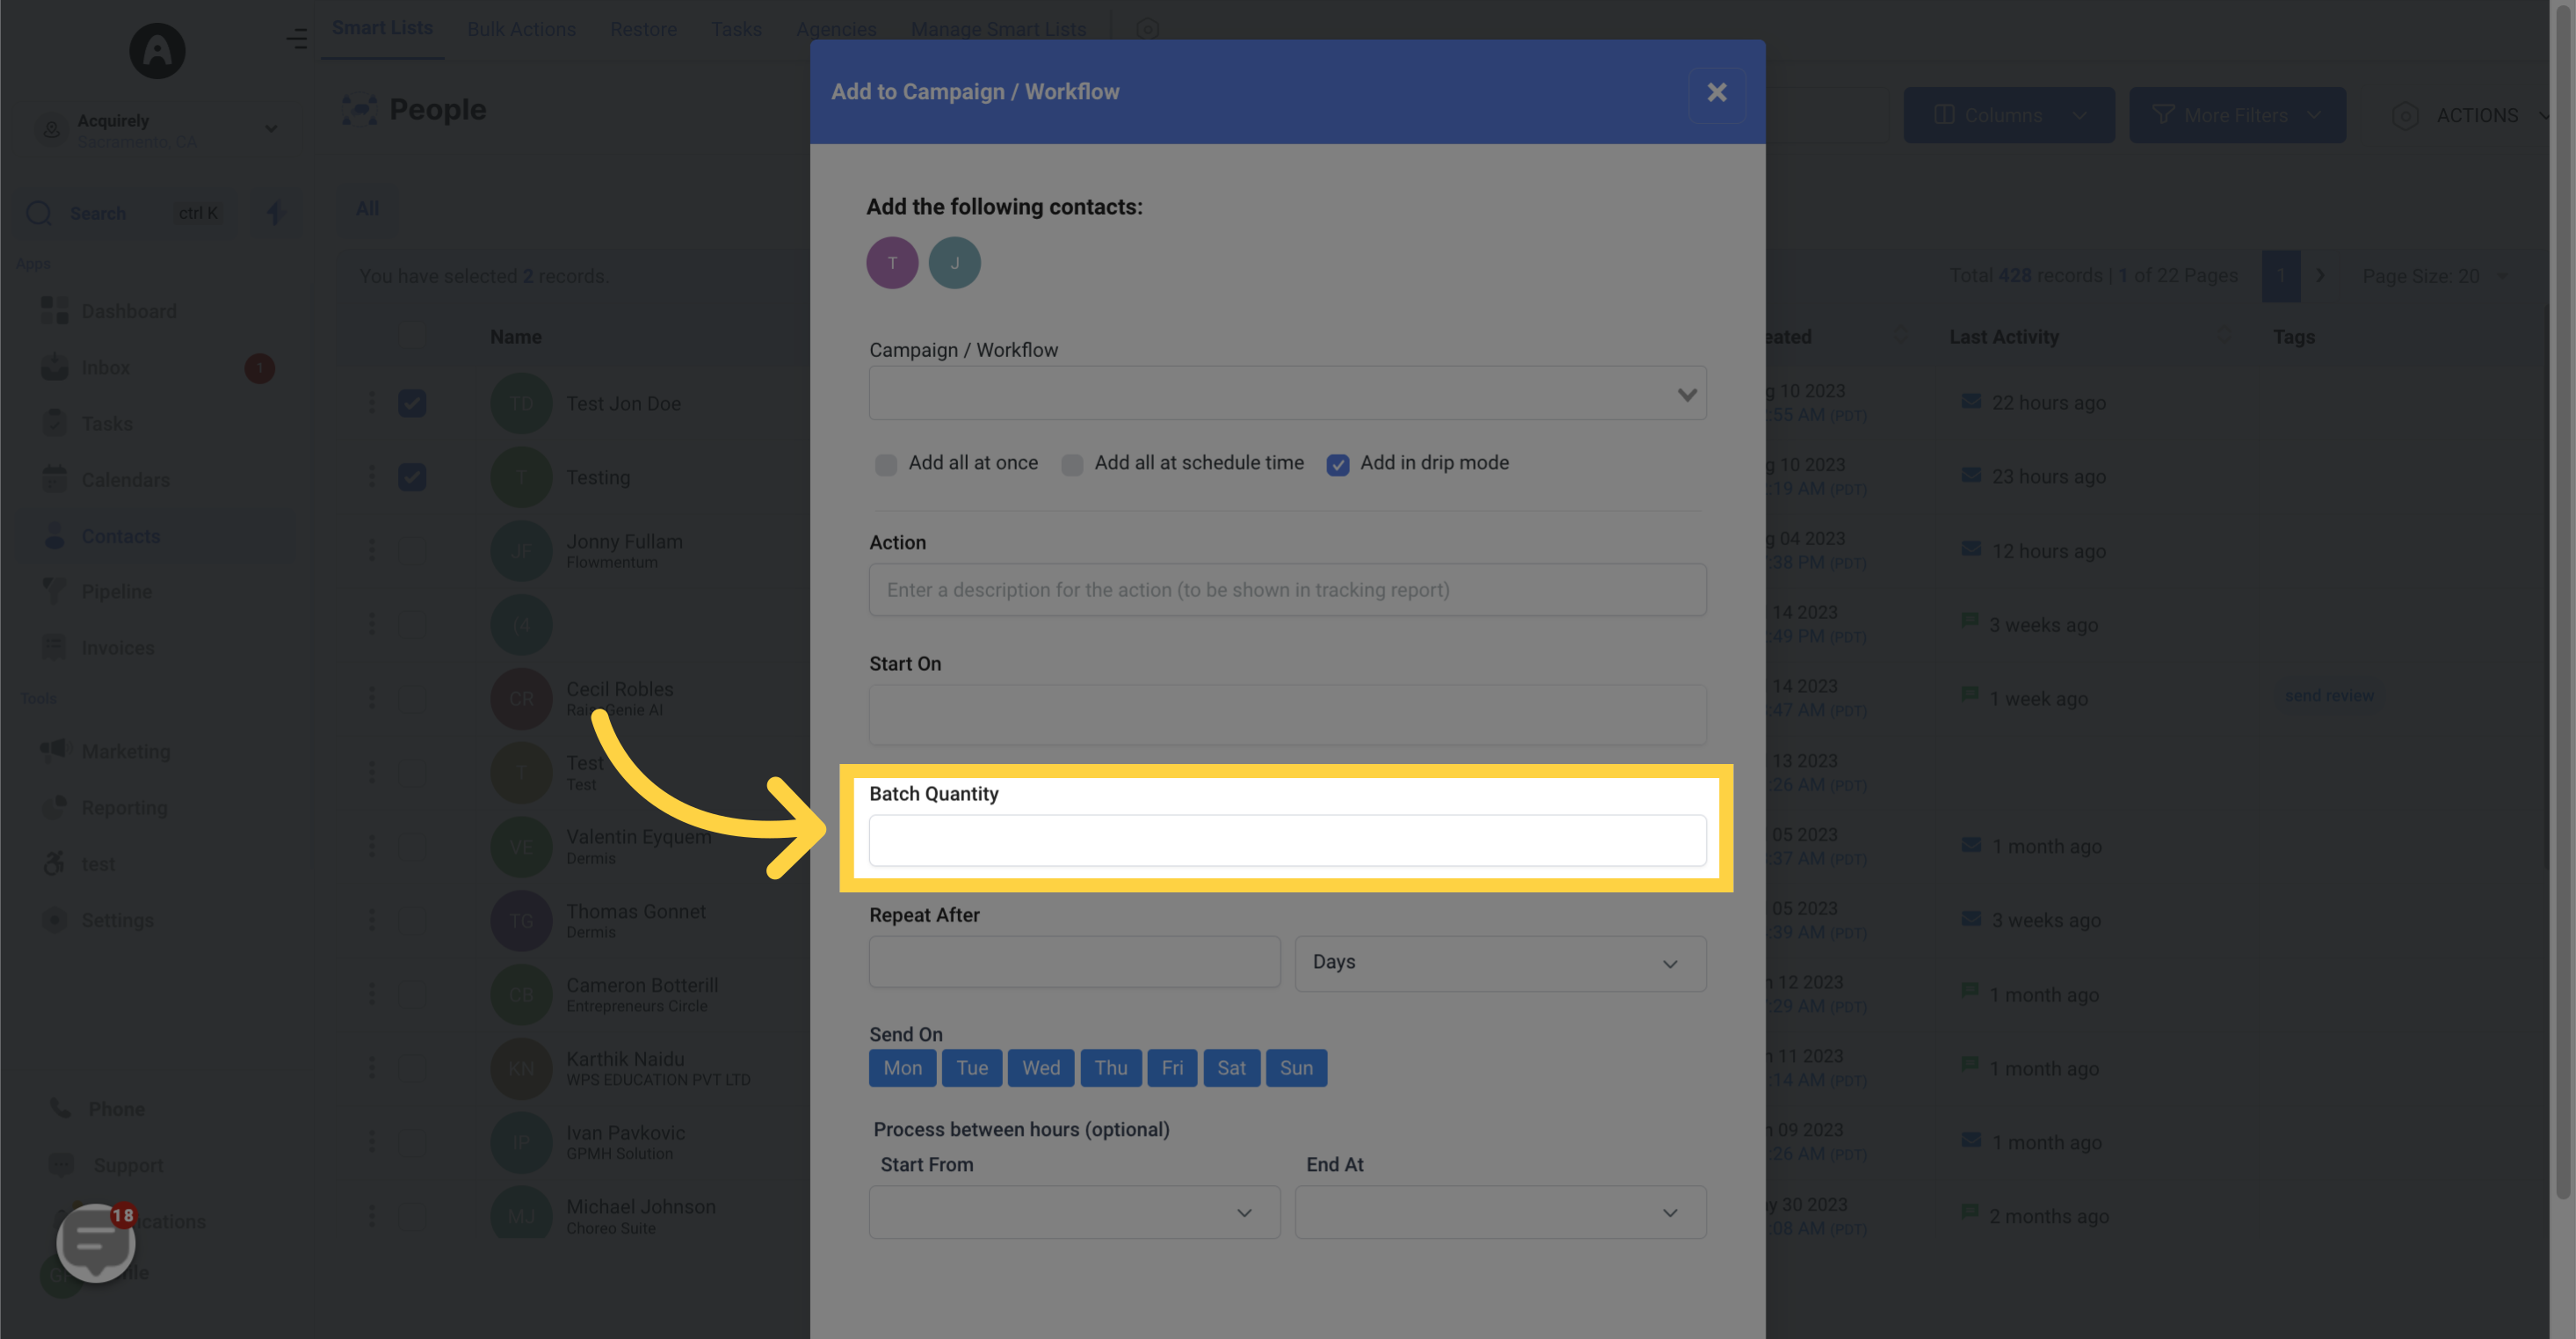
Input "Batch Quantity"
Specify the number of contacts you want to send per batch.
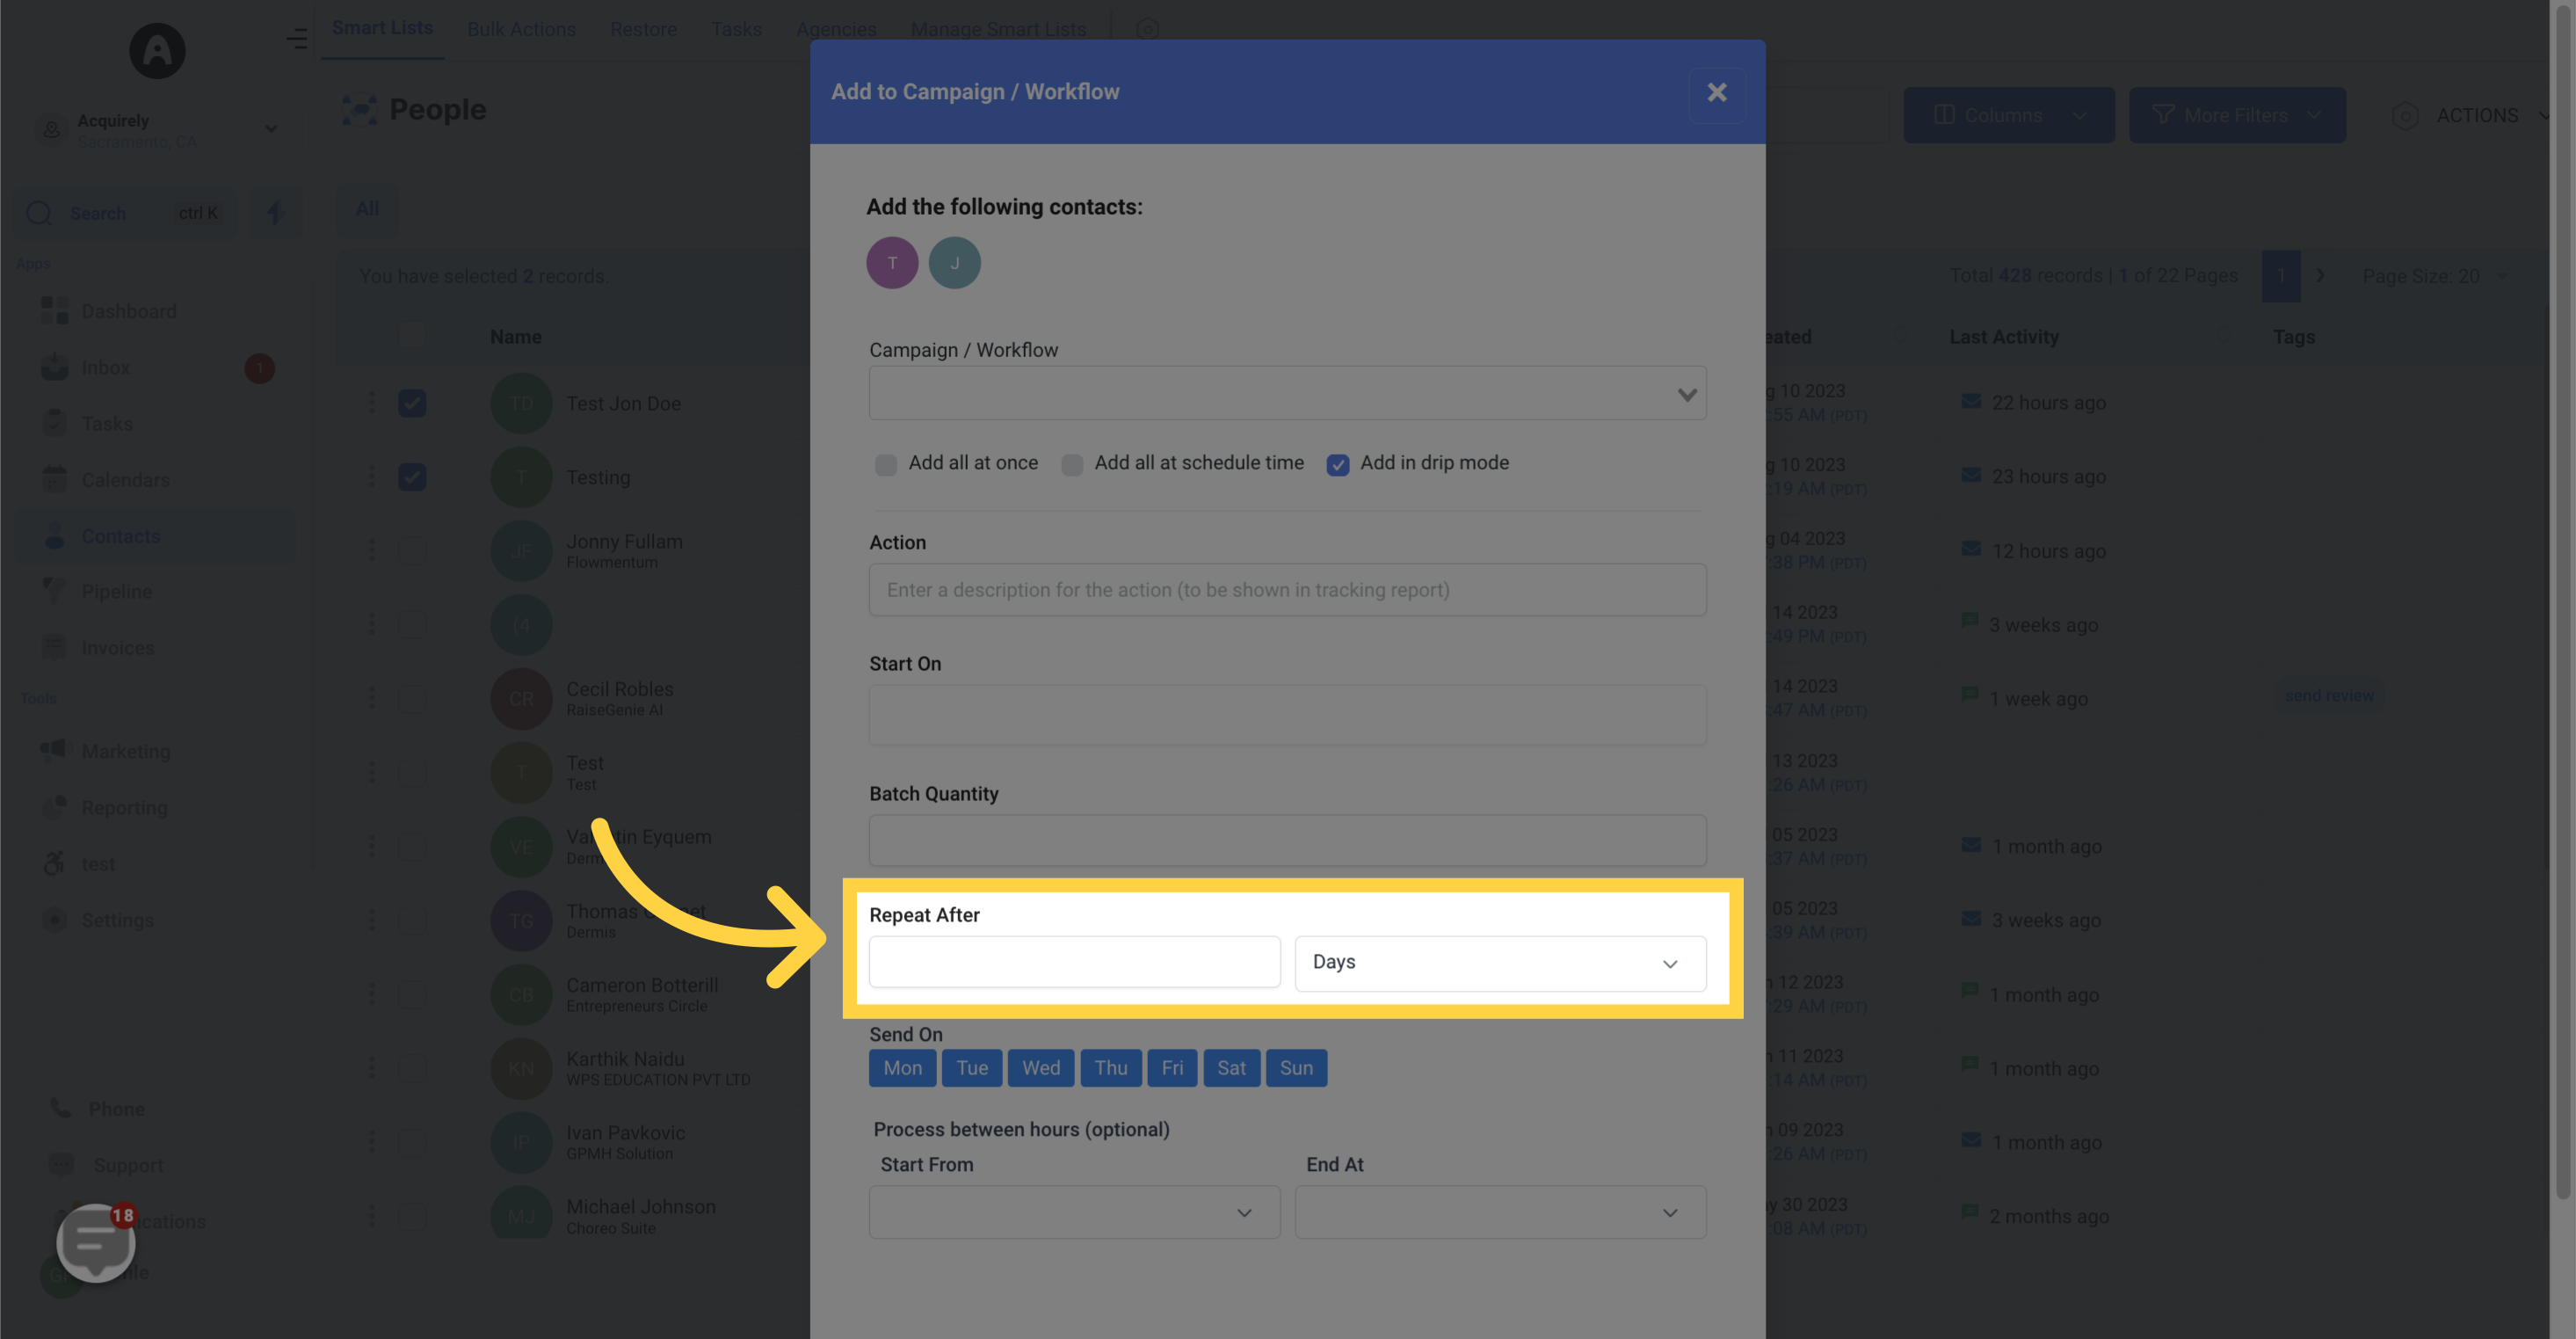
Select "Repeat After"
Decide the time interval between each batch, ranging from seconds to days
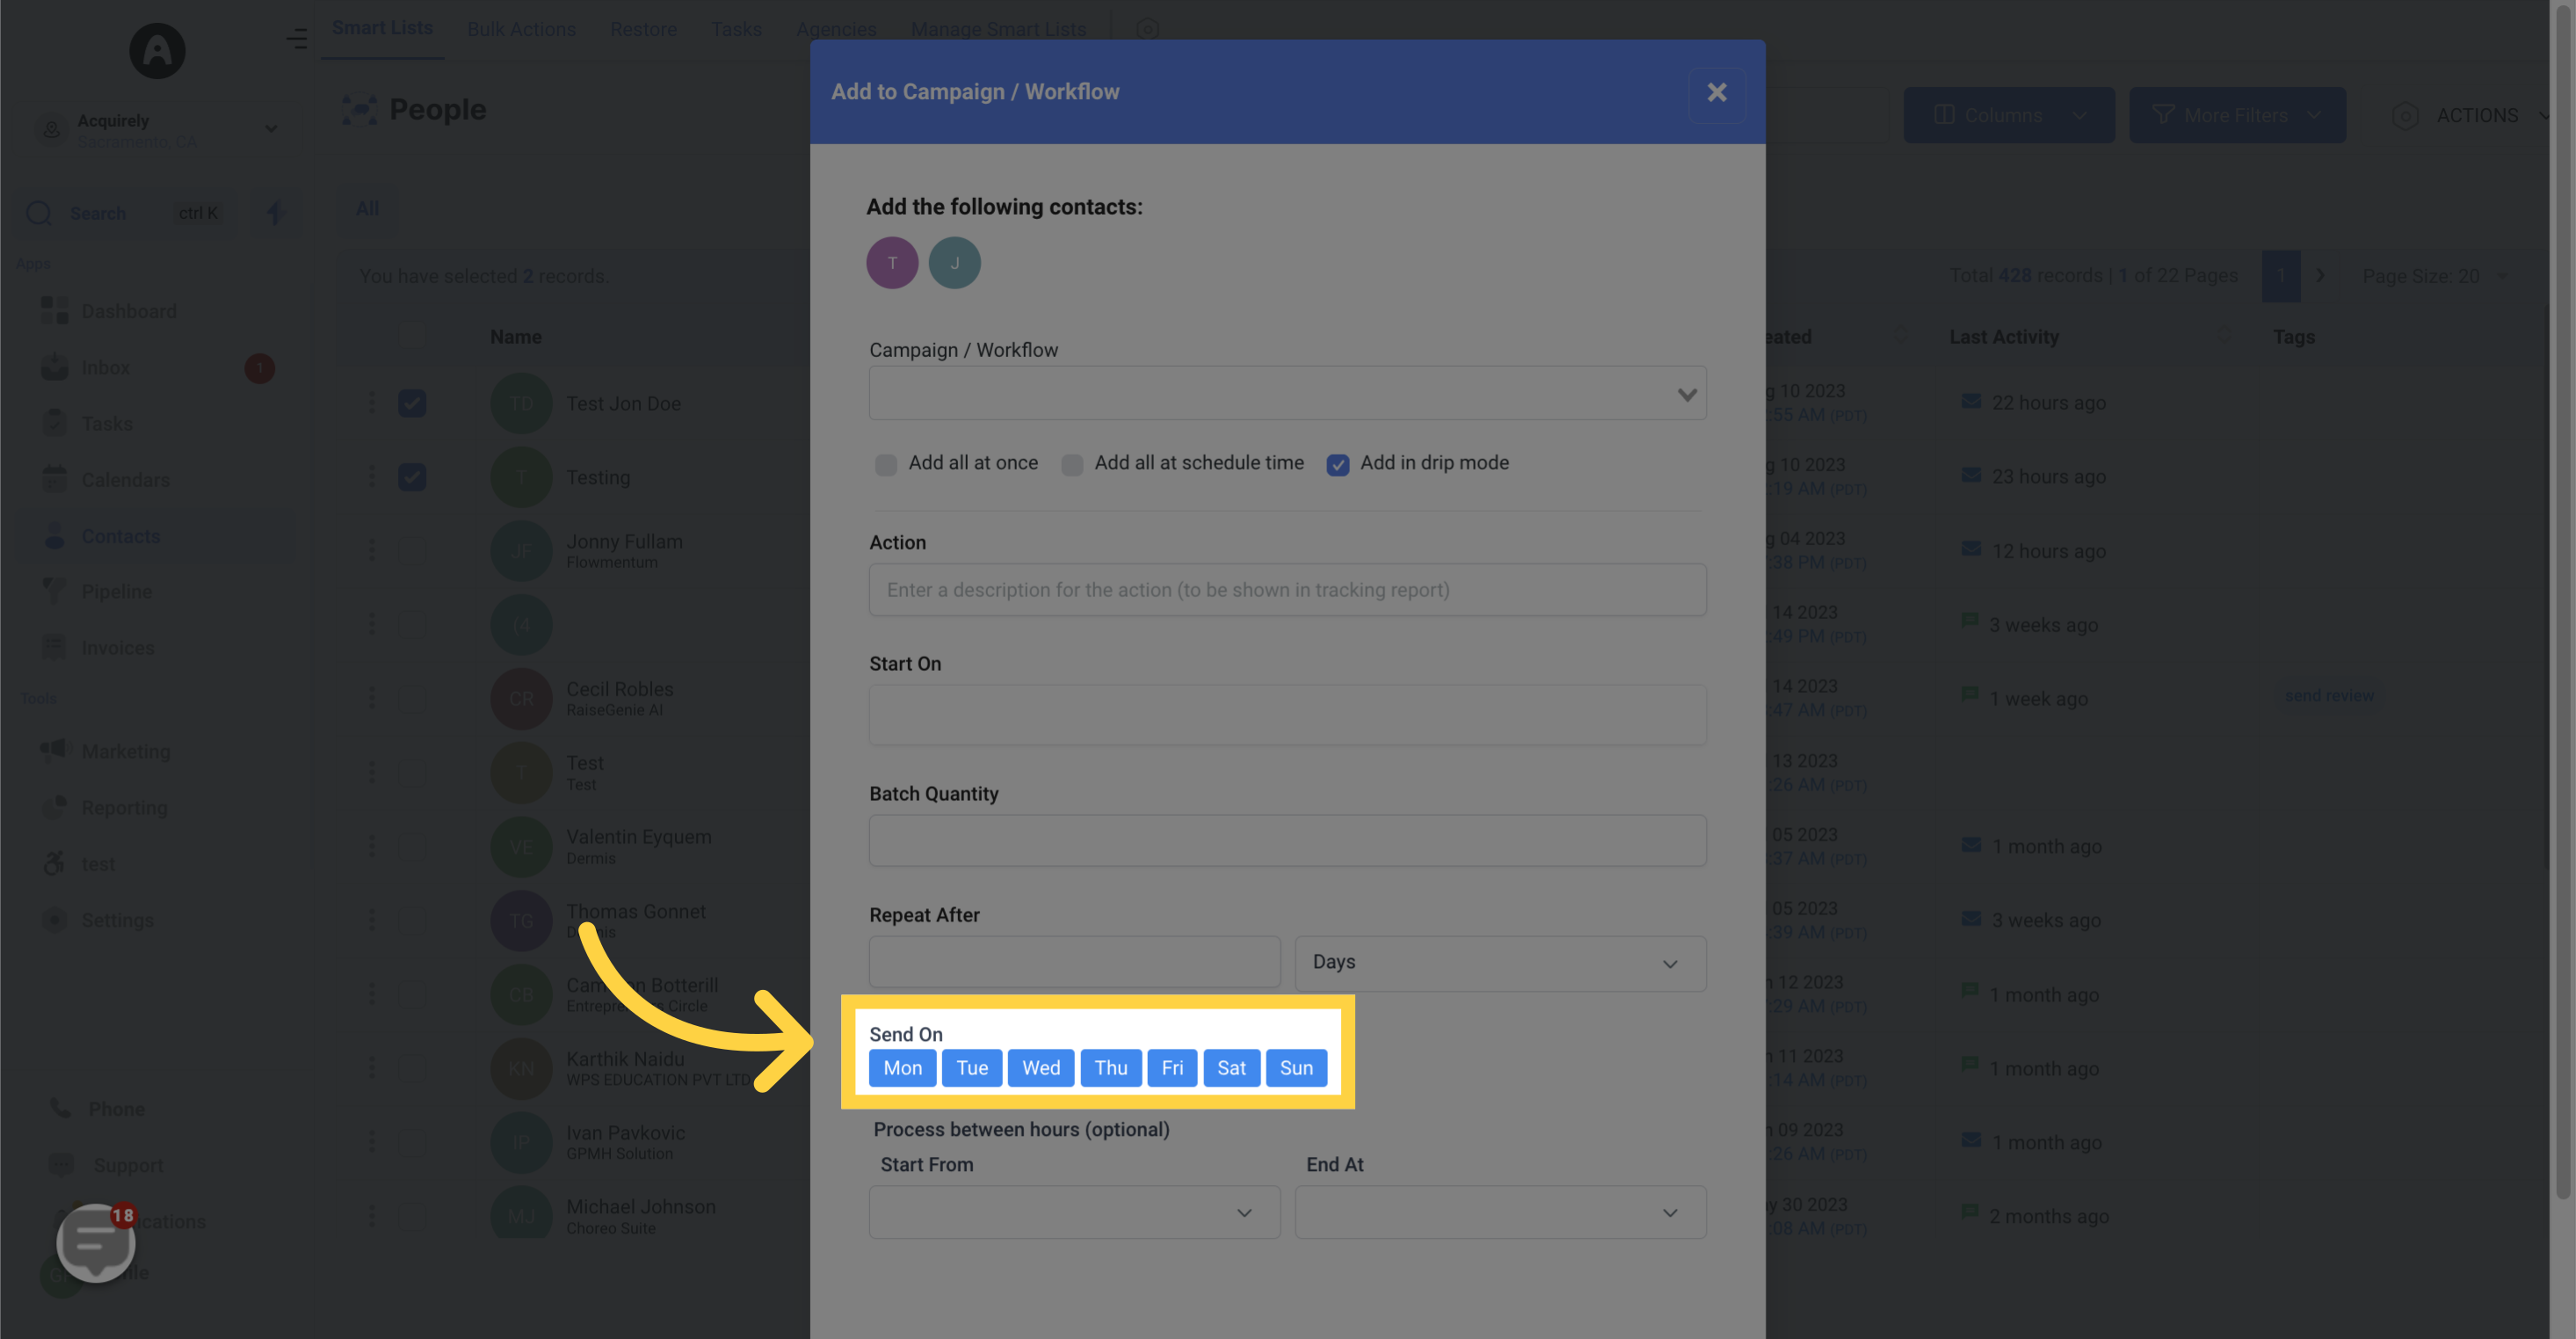
Select "Send on"
Select the day(s) of the week when you want to send the batches.
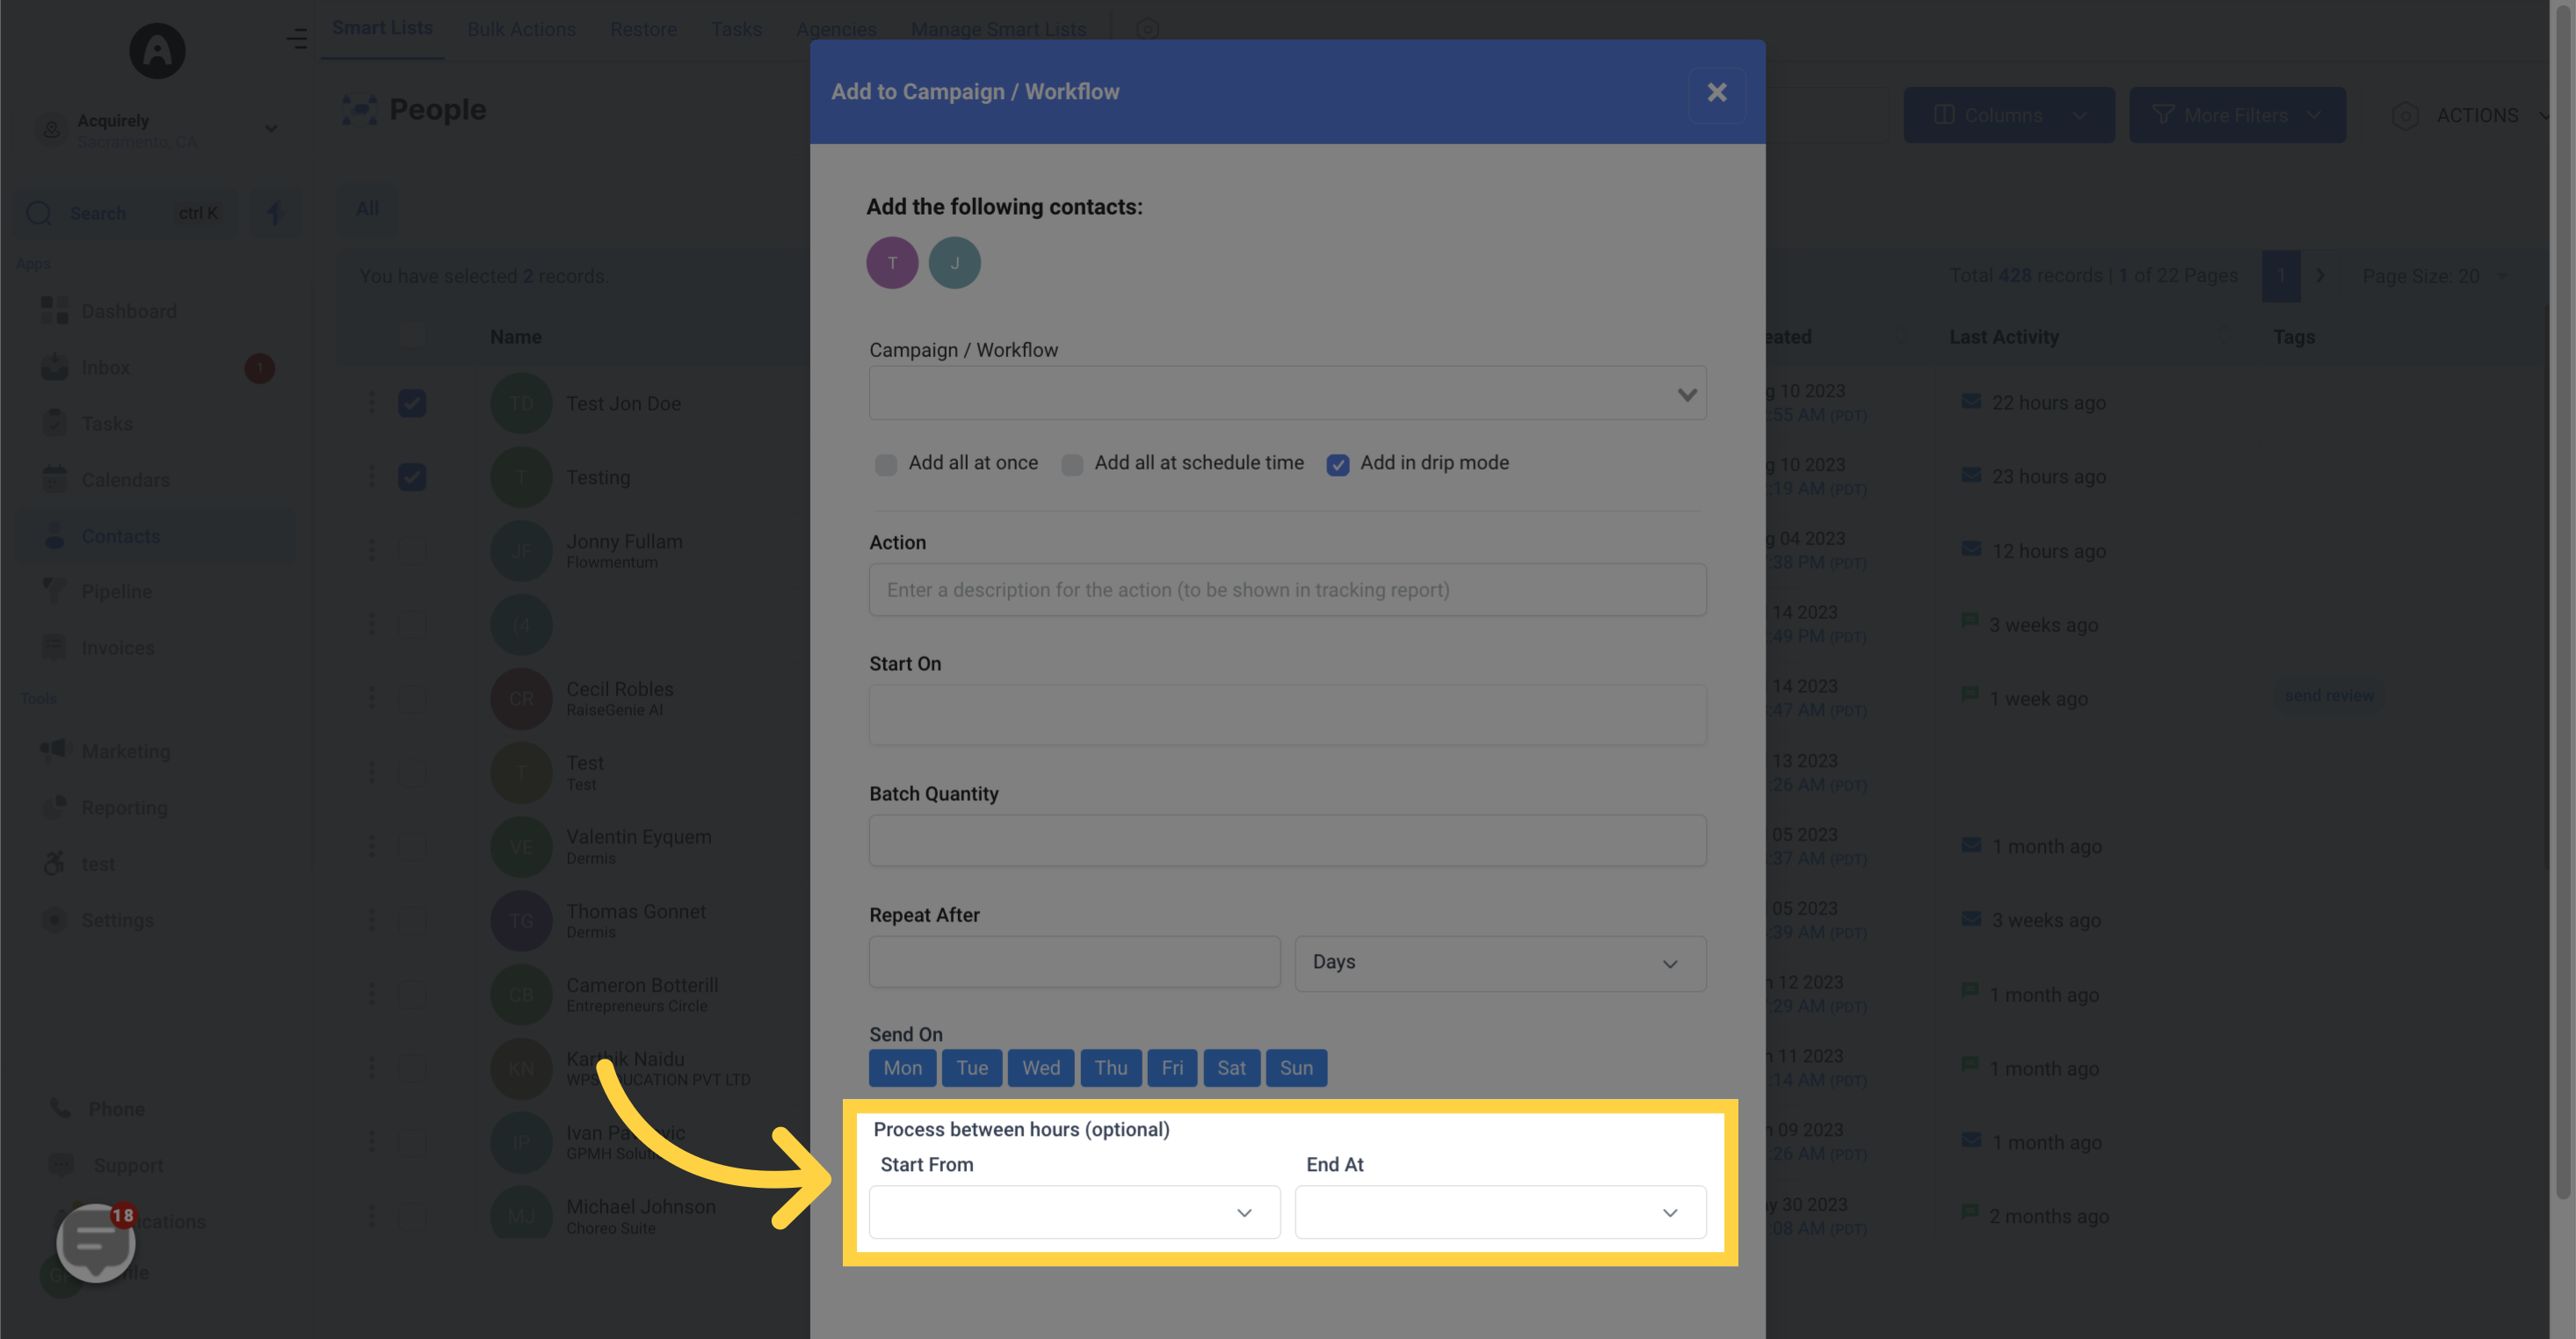
The process between hours (optional)
Choose the duration during which you want the process to start and end.
10. Click "Add to Campaign/Workflow"